Categories Painting

Can You Paint Over Mold and Will it Kill It? 

Can You Paint Over Mold?

If you’re thinking of repainting an older bathroom or basement, you may ask,”Can you paint over mold?” The answer to this question is always a resounding no. It doesn’t matter what type of paint you use or how many coats you apply in an attempt to kill it. Your paint may look really great for a while, but eventually the mold will continue to grow through the paint. There are additives in certain paints that are successful at proactively preventing mold from returning but they won’t kill existing mold. 

Mold and mildew are indicators of moisture problems. You’ll have the most success if you can pinpoint why there is an overabundance of moisture, remedy that, and take measures to kill the mold before painting. 

In this article, we’ll go over how to recognize mold, how to get rid of it, and the best products and paints to use that will prevent it from coming back. 

Get Free Estimate

Should You Paint Or Install Floors First?

Can You Paint Over Mold? 

As stated above, you can’t paint over mold. Well, technically you can but you won’t be happy in the near future when it comes creeping through your beautiful finish. Painting over mold can cause your paint to bubble and peel. Covering mold with paint will not kill the mold, just mask it for a while. Visible mold is often an indicator that you may have more hiding behind your walls and ceiling. If you suspect this could be the case, we recommend contacting a professional mold remediation company to come take a look. Not only is mold unsightly but it can lead to some pretty severe health issues.

What Does Mold Look Like?

Most types of bathroom mold are gray, black, or brown spots with a fuzzy or wooly texture. It’s important to be able to identify mold or mildew in your home. Once spotted, take action promptly to get rid of them. 

Most Common Places to Discover Mold Around Your Home

Sometimes mold and mildew can be growing for years without you spotting it. This is unfortunate because in addition to the damage mold can do to your home, you could be breathing it in and also hurting your health. We’ve compiled a list of the most common places to look for mold both inside and outside your home: 

  • Under kitchen and bathroom sinks 
  • Bathroom walls and ceilings 
  • In your attic which could mean you have a leaky roof 
  • On the shady parts of your home’s exterior 
  • On your exterior porch area 

Does Kilz Kill Mold? 

Even though its name may lead you to believe otherwise, Kilz mold and mildew primer won’t actually kill mold. It will however be very beneficial to use after you’ve successfully removed any mold, in preventing it from returning. 

Does Zinsser Kill Mold 

By now you may have noticed the recurring theme to this article. Both Zinsser and Kilz claim to kill mold. This is misleading because you need to remove the mold before applying either of these products. Both products do work extremely well at inhibiting mold but only after your surface has been completely cleared of it first. 

What Doesn’t Work 

There are several things that just don’t work in regards to painting over mold. For example, regular interior paint won’t kill mold, and might actually be a source to feed the fungus you’re trying to eradicate. Don’t rely on mold-killing primer or paint. It’s in your best interest to use a good cleaner to neutralize the surface first.

How To Dispose Of Paint

How to Remove Surface Mold Before Painting 

Now that you know just how important it is to completely eradicate mold before just covering it up, lets learn how to remove surface mold before painting: 

  • Protect yourself by wearing the proper face mask, gloves, and safety glasses. Touching or breathing in dangerous mold can be detrimental to your health. Take extra caution if you have a compromised immune or respiratory system. 
  • Remove the source of the moisture before you do anything else. This could include replacing an air duct that is spreading mold in the air or fixing a leak that is causing mildew to grow. It may be helpful to contact a professional plumber if you can’t fix or find the source yourself. 
  • Replace any damp or damaged drywall. Most of the time, mold can’t be permanently removed with a simple surface cleaning. This means you’ll need to cut out the section of drywall that is affected and repair it before moving forward. This can be a tedious step but a very important one. If you have to remove the drywall in the future, you will have wasted your time and money painting over it in the first place. 
  • Scrape off the peeling or bubbling paint using your basic paint scraper from your local hardware store. 
  • Clean the surface with mold-removing detergents. Allow it to sit on the surface for the allotted time recommended by the manufacturer then rinse thoroughly. 

Interior Use

For Interior use we recommend using Fiberlock Shockwave detergent. For exterior use, Mold Armor or Jomax are the brands to look for.

  • Allow plenty of time for the surface to dry. This step is important because you definitely don’t want to prime or paint over a surface that is even slightly damp. 
  • Apply a mold-inhibiting primer to the entire wall or ceiling you’re working with. It will take a little extra time but painting the whole wall instead of just the portion with mold will give a much better end result. 
  • Apply ceiling paint designed for humid areas such as bathrooms. 
  • Install a heavy-duty bathroom fan that has enough power to clear most of the moisture from the air. Run the fan during your shower and for 30 minutes after you get out. This is a great way to prevent future mildew or mold growth. 

Can You Paint Over Mold Conclusion 

Painting over mold is never a good idea. It will always grow back unless it was completely cleared beforehand. While Idaho isn’t a particularly humid state, that doesn’t mean you won’t have mold problems. Small amounts of mold and mildew are relatively easy to clean with a standard cleaner and some elbow grease. If mold keeps returning or you have a particularly stubborn issue with mildew, contact a plumber for expert help. 

If you’ve removed the mold and are looking for an experienced Boise painting contractor, turn to Boise Home Painting. Our skilled team of painters can take on any painting project and guarantee you’ll love the finished product. We serve the entire area including Eagle, Nampa, Meridian, Caldwell, and more! Plus, we do interior and exterior painting. Get your free estimate today!

Request A Quote

How Long Should you Wait Between Coats of Paint?

Categories interior painting

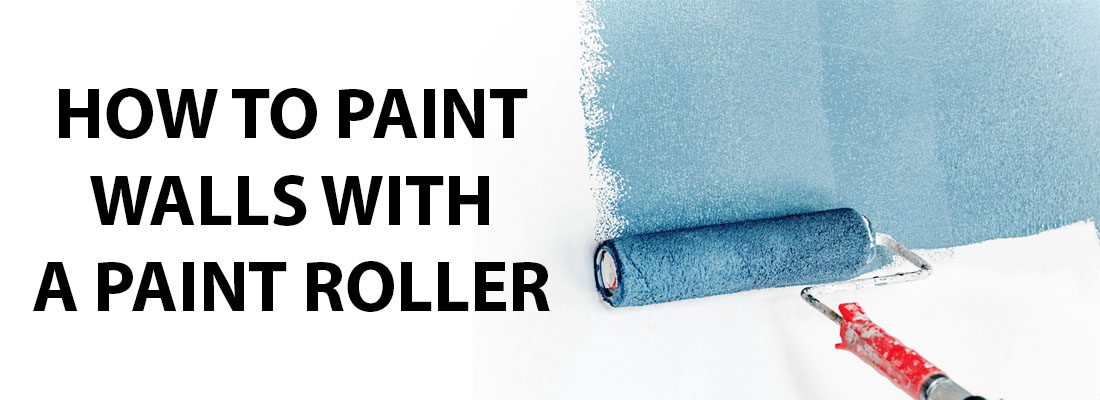
How To Paint Walls With A Roller: Step-By-Step Guide

How to paint walls with a paint roller

Why should you learn how to paint walls with a roller? For starters, it’s a super easy and efficient way to freshen up the look of a room. Before you get started, it’s important to prepare your interior walls and prime them so the paint will adhere better. We’ll also go through the details cutting the edges of the walls and fill in any holes or cracks. We’ll go over all of this in more depth below to make it easy for you. Follow the steps below to learn how to paint walls with a roller.

Request A Quote

How To Use Black Ceiling Paint

Prepping to paint walls with a roller

Before you start painting your walls, you’ll need to do the necessary prep work. Part of that is having all the right materials. Below is a list of everything you’ll need to paint your walls with a roller and do all the right preparation: 

  • Paint roller frame 
  • Paint roller cover 
  • Paint 
  • Primer 
  • Spackle 
  • Sandpaper 
  • Soap and water 
  • Newspaper or cardboard 
  • Paint tray 
  • Paint brush

Cleaning the walls

Start by cleaning the walls with a damp cloth to remove any dust and dirt. If you are painting over glossy or semi-gloss paint, use a light sandpaper to dull the finish. You’ll want to start by removing any dust, cobwebs, and dirt from your walls. You can do this with a vacuum, a damp cloth, or a damp sponge. If the walls are heavily soiled, use a mild soap and water solution to clean them. Make sure you rinse the walls with clean water and let them dry completely before painting. 

Sanding

Next you’ll need to use a fine sandpaper to remove any bumps or imperfections in the surface of the walls. Fill in any holes or cracks in the walls with spackle or other appropriate filler. Once you can see that the walls are completely dry and smooth, apply a coat of primer before painting. This will help you ensure an even and professional finish.

Priming the walls 

Prime the walls with a good-quality primer. This will help the paint adhere better and create a smooth surface. When you start, prepare the wall surface by filling any holes or cracks with spackle and sanding the area smoothly. Apply a coat of primer to the wall using a paint roller. Make sure to roll the roller in a “W” pattern, starting at the top of the wall and working your way down. You’ll need to let the primer dry for at least two hours. Once it’s dry, you can apply a second coat of primer, if necessary. Again, use a paint roller and apply it in a “W” pattern. Let the second coat of primer dry for at least two hours before painting.

Should You Sand Between Coats of Paint?

Cut in the edges and fill in the holes

Use a brush to cut in the edges of the wall, such as around the ceiling, baseboards, door frames, and windows. Then you’ll need to fill in any holes or cracks with spackling compound or caulk. Don’t forget to let the compound dry before continuing.

Prepare the roller

Pour the paint into a paint tray and insert a roller cover onto the roller. Dip the roller into the paint and roll it off onto the tray to evenly spread the paint. Once you’ve done this, you can start rolling the paint onto the wall. Start in a corner of the room and roll the paint onto the wall. Move the roller in a “W” pattern to ensure even coverage. Do you notice a pattern here? Painting in a “W” pattern is key. 

Don’t forget to backroll

To back roll with a paint roller, start by painting the surface with an up-and-down motion. Then, use the roller to go over the area in a crisscross pattern from one side of the room to the other, and then back again. This will help to spread the paint evenly and eliminate any brush marks or lines. You don’t NEED to backroll but we recommend you do because it helps your paint job last longer. We backroll on every paint job we do. If you don’t, your paint will look noticeably faded after just a few years. 

Cleaning up after painting with a roller

When you’re finished painting, remove the roller cover and wash it with soap and water. You can remove excess paint from the roller by rolling it onto a piece of newspaper or absorbent cloth. Next, rinse the roller in warm water to remove any remaining paint. Squeeze out any excess water and shake the roller to remove any excess paint that might be remaining. Once you’ve done that, place the roller in a bucket of warm, soapy water and let it soak for 15-20 minutes. Then you can rinse the roller off and spin it between your hands to remove any remaining paint. Lastly, hang the roller up or lay it on a towel to dry.

Places to buy your paint supplies in Boise

Here’s a list of places where you can purchase everything you need to paint walls with a roller:

  1. Boise Paint & Supply
  2. True Value 
  3. The Home Depot 
  4. Lowe’s 
  5. Sherwin-Williams 
  6. Ace Hardware 
  7. Do It Best Hardware 
  8. Idaho Paint and Supply Company

Conclusion on how to paint walls with a roller

Learning how to paint walls with a roller isn’t difficult. It just takes some time, the right materials, and following the right steps. But it is a lot of work. That’s why a lot of people decide to hire a professional painter. We can do that for you. In fact, we’ll give you a free estimate if you live in the Boise area. We serve everywhere from Boise to Meridian, Nampa, Eagle, and Caldwell

Free Estimate

Matte Finish vs Satin and Gloss Finish

Categories Painting

The Enamel vs Latex Paint Guide 

Enamel vs Latex Paint

When you’re taking on a large DIY painting project, you first need to consider what type of paint will be most appropriate. We’ve created an enamel versus latex paint guide to help you make the most educated decision. Your paint choice will largely depend on the type of surface you’re painting along with several other factors we’ll discuss later on. Continue reading to learn more about the pros and cons of enamel vs. latex and when it works best to use one over the other. 

If you live in the Boise area and need a professional painter to paint your home, we’ll give you a free estimate! We serve all of Treasure Valley including Meridian, Boise, Eagle, and Nampa!

Free Estimate

Matte Finish vs Satin and Gloss Finish

What are the Differences Between Enamel vs. Latex Paint?

The main difference between enamel and latex paint is that enamel paint is oil-based while latex paint is water-based. Enamel paints are slow to dry but dry hard. For this reason, enamel paints are your best choice for painting hard surfaces. Latex paints are the better choice when painting surfaces that might expand or need flexibility. 

What is Enamel Paint Best For? 

Enamel paint is typically used for painting exterior residential walls. Its hard, glossy finish makes it not the best choice for interior walls. If you live in an area with extreme climate and temperature changes, enamel paint may not be the best for outdoor use. It doesn’t have the give and flexibility that acrylic paint has. 

Enamel paint is well-suited for kitchen cabinets, trim, doors, and other areas that may need to be cleaned frequently. But be sure to consider that enamel paint holds too high-gloss of a finish for interior walls and ceilings. Because of this, it has a tendency to show imperfections, roller marks, or uneven textures on your walls. 

Now that you understand a little bit more about both kinds of paints, let’s go over the advantages of both enamel and latex: 

Advantages of Using Enamel Paint 

  • Longer Drying Time 

A longer drying time may seem like a disadvantage. But in reality, when a paint takes more time to dry, it gives you more time to work with the paint to achieve a smooth finish. 

  • More Flawless Finish

Enamel paint is known for its excellent coverage and smooth, flawless finish. Because of its oil base, it’s compatible with most building materials and is resistant to scratches, stains, and heat. 

  • Easy to Clean 

The more gloss or shine a finish has, the easier it is to wipe down and clean. Because of its hard finish, enamel paint works excellent for surfaces that need to be wiped down often as it’s resistant to moisture. It can be used on surfaces such as metal, glass, copper, wood, plastic, and walls.

  • Waterproof 

This type of paint is known for its washable and glossy finish and durable properties against moisture. 

Should You Paint Or Install Floors First?

What is Latex Paint Best For? 

Latex paints are most often used to paint larger surface areas in homes such as interior walls and ceilings. Because it’s water-based and less toxic than oil-based paints, it’s the best choice for areas where you and your family will be residing. 

Advantages of Using Latex Paint 

  • Budget-friendly 

When you need to cover a large amount of surface space such as interior walls, latex is a less expensive option than enamel. 

  • Ideal for Unprimed Drywall 

If you’re planning to paint on unprimed stonewall, brick, or drywall, latex is your best choice. 

  • Best on Surfaces Already Painted with Latex 

Surfaces that have previously been painted with some kind of latex paint will look better when repainted with another latex application.

Factors to Consider when Choosing Enamel vs. Latex Paint

  1. Interior vs. Exterior Use 

Latex paint is ideal for use on interior walls and ceilings. The matte type finish has just the right amount of sheen for an aesthetic and modern look. Because latex paint has a less durable and hard finish, it’s less suitable for outdoor or exterior use. 

Enamel paint is better suited for outdoor use. While it has a tendency to fade or yellow over time, choosing a neutral enamel paint color will be less likely to fade. This would include earthy tones such as tan, cream, or taupe. 

  1. Finish 

If you want to stick with an eggshell or matte finish, you should choose latex paint for your project. If you feel a hard and glossy finish is best, go with enamel paint for your project. Enamel paint is available in a satin, semi-gloss, and high-gloss finish. These sheens are best for high durability and areas of wear and tear. 

  1. Drying Time 

It’s important to keep in mind that latex paint dries fast, motivating you to paint quickly. Enamel paint takes quite a bit longer to cure giving you more time to create the perfect finish. 

  1. Paint Odor and Fumes 

If you’ve ever painted in an enclosed space, you know just how powerful and irritating paint fumes can be. Latex paint gives off a mild odor which makes it the better choice for larger interior projects. On the other hand, enamel paint gives off much stronger fumes and should be reserved for smaller projects or outside use. 

  1. Cleanup 

No one likes the cleanup portion of a project. But because latex paints are water-based, the cleanup will likely require only water and some rags. Enamel paints however, need paint thinner for cleaning out brushes and areas where paint has spilled or splattered. 

Is Enamel Paint Waterproof? 

Yes, enamel paint is waterproof. However, that doesn’t necessarily mean it’s the best outdoor paint option. Because enamel paint tends to dry to a harder finish, it can become brittle and crack on a surface that may expand and contract when temperatures change. 

Is Latex Paint Waterproof? 

Latex paint is also water resistant. Unlike enamel paint, latex paint dries with some give and flexibility, making it another option for exterior use.

The Enamel Vs. Latex Paint Guide Conclusion 

There is a time and a place for both enamel and latex paints. Determining what type of finish or sheen is best for your project will ultimately make your

decision easy. Go with latex paint when a matte or eggshell finish is desired or enamel paint when a satin or high gloss finish seems appropriate. If you’re looking for a respected residential or commercial painting contractor in the Boise area, get in touch with Boise Home Painting. We are a family-owned business that has years of experience painting throughout the entire Treasure Valley. Both interior and exterior painting are big jobs to take on. Why not turn it over to the professionals who will guarantee their work? Give our office a call today!

Request A Quote

How Long Should you Wait Between Coats of Paint?

Categories interior painting

How Much Does it Cost to Paint Kitchen Cabinets? 

Cost To Paint Kitchen Cabinets

Giving your cabinets a fresh coat of paint is one of the most cost-effective ways to give your kitchen a fresh new look. So how much does it cost to paint kitchen cabinets? Repainting your cabinets will be a much less expensive project than resurfacing or replacing them. In this article, we’ll discuss the cost of painting your cabinets as a DIY compared to hiring a professional as well as ways to save you money in both instances.

If you live in the Boise area and need a professional painter to paint your kitchen cabinets, we’ll give you a free quote! We serve the entire area including Meridian, Boise, Eagle, and Nampa!

Free Estimate

Boise Cabinet Painting

How Much Does it Cost to Paint Kitchen Cabinets? 

The cost to repaint your kitchen cabinets may be less expensive than you think. On average, you can expect to pay somewhere between $400-$1300 depending on the quality of paint and the size and layout of your kitchen. This cost is mainly for labor but also includes the paint and other supplies. The national average is roughly $750 per kitchen. Because having your kitchen cabinets painted won’t break the bank, it remains one of the most popular kitchen renovations to up the value of your home.

What Goes Into Cabinet Painting 

There’s a fair amount of prep work that goes into painting your kitchen cabinets if you are attempting to do it yourself. It will pay off in the long run if you take the time beforehand to gather all the necessary materials and give yourself plenty of time. Plan on several days to complete the project. Always wear the appropriate safety gear and remember to open your windows for proper ventilation. 

Step 1. Determine the Cabinet’s Condition 

Surfaces that are already painted can be painted again but only if the existing paint is in good condition. If not, the old paint will need to be removed. This may require stripping products and some extra sanding to remove the old paint completely. 

While assessing the condition of your cabinets, you may decide that some doors need to be completely replaced rather than repainted. You’ll need different supplies and materials depending on what prep work your cabinets need. 

Step 2. Remove Dust and Grease 

Before applying any primer or paint, it’s important to make sure your cabinets have been thoroughly wiped down to remove all grease, dust, and dirt that has built up.

Step 3. Remove the Cabinet Doors 

Your next step will be to remove the doors, drawers, and hardware. It’s a good idea to label each piece with painter’s tape to eliminate guesswork when it comes time to put everything back together. Place the hardware in plastic bags and label where they go as well. 

Because there will be sanding taking place during the process, you’ll want to empty your cabinets at this time. This way you won’t have to wash every dish after your project is completed. 

Step 4. Prep and Sand 

Use drop cloths to cover your countertops, appliances, and any other areas you want to protect from dust and paint. Use painter’s tape to protect areas on the wall along the edge of your cabinets. Next, sand all cabinet surfaces with a medium-grit sanding block. A scuffed-up surface will help your primer and paint adhere much more effectively. Use a piece of folded sandpaper to get in the nooks and crannies and corners of your cabinets. Wipe down all cabinet surfaces thoroughly to ensure no fine dust particles remain. 

Step 5. Prime 

Primer isn’t always necessary. However, in this case, we feel priming is an important part of the process. Primer not only covers imperfections but also provides the best surface for paint to adhere to. Allow plenty of time for the primer to dry before moving on to painting. 

Step 6. Paint 

When applying paint to your kitchen cabinets, you can either use a roller or a brush. If you’re a little more advanced and have access to one, a paint sprayer is also an excellent option. Start by painting your cabinet frames, then the backs and fronts. 

Step 7. Apply a Second Coat 

After allowing several hours for your first coat to dry, we recommend applying a second coat. It will definitely take more time but is well worth it for the extra coverage and protection it provides. 

Step 8. Reassemble Kitchen Cabinets 

Once you’re certain your cabinet surfaces are completely cured, you can reassemble the doors to the frame as well as replacing your hardware.

Do I Need to Prime Before Painting? 

How to Calculate the Cost of Painting Your Kitchen Cabinets?

We mentioned that several factors go into figuring out the cost of repainting the cabinets in your specific kitchen. Let’s discuss the most common factors in detail: 

  • Paint Quality 

While there are a variety of paints designed specifically for kitchen cabinets, any high-quality paint should work. You’ll want to be sure to go with acrylic paint and avoid vinyl. Because kitchen cabinets need to be frequently wiped down, they do best with acrylic latex-based paint because of its durability. The higher quality your paint, the more expensive your cost will be. 

  • Painting Supplies Needed 

Deciding which painting method you want to use will play into your overall cost of the project because it will determine what tools you need to purchase. Spraying is an efficient method that gets the job 

done fast but may not be a tool you have on hand. Rollers and brushes are less expensive and are great for those hard to get into areas. Remember that whichever method you go with, you’ll need to purchase the primer, paint, drop-clothes, tape, paint pans, sandpaper, etc. These supplies add up to around $250-$550. When you hire a professional, they already have these materials. 

  • Kitchen Size 

Obviously, the fewer cabinets you have, the less expensive your job will be. So if you know you have a small kitchen, expect to pay less as opposed to a kitchen with larger square footage. 

  • Cabinet Surface Area 

If you have standard-size cabinets, a painting contractor may quote you a certain price per cabinet piece such as a drawer or door. However, they may charge you more if your cabinets have a larger surface area. It will commonly cost you more if your kitchen is difficult to maneuver in or has an excessive amount of corners. 

  • Labor Cost 

Labor costs will be a substantial amount of your cost. Depending on where you live, painting contractors may charge between $25-$50 per hour while others charge a base rate after calculating the total linear feet of your cabinets.

Cost to DIY and Cost to Hire a Professional 

DIY painting projects usually seem doable and typically save you a substantial amount of money. But it’s important to keep in mind that painting experts know the ins and outs of their trade and have the skills to do the job right. 

The bulk of your costs for a DIY project will come from purchasing paint and primer along with other painting supplies. A high-quality paint will run you about $55 per gallon. One gallon will generally cover 12 cabinet surfaces. To achieve the most professional look you can, you’ll want to purchase a quality primer as well. These two products combined will run you between $13 to $15 per cabinet surface. 

We know from experience that many homeowners attempt to paint their kitchen cabinets themselves and regret the time and money they put into it. They aren’t satisfied with the finished product. 

Repainting your cabinets is also a pretty big undertaking and will consume a few days of your time. Remember that time is money. Sometimes paying more to ensure you will love the end result while freeing up time for you to accomplish other things is simply the best way to go. 

A team of professionals will mean your kitchen is disrupted for a shorter period of time, will help protect the rest of your kitchen, and they will know the best paint or stain for your specific cabinets. 

Why You Should Get Your Kitchen Cabinets Repainted

We’ve already mentioned a few of the reasons why people might repaint their kitchen cabinets. However, below are the three main reasons:

  • Cost-effective renovation method 
  • Adds value to your home 
  • Updates and refreshes your style 

How to Save Money Painting Your Cabinets 

If you feel that hiring a professional painter is the best way to go but are worried it will cost too much, we have some helpful tips to save you money: 

  • Watch for deals or discounts offered by your local painting companies. 
  • Remove your cabinet drawers, door, and hardware by yourself. This will save you money on labor costs and is very simple to do.
  • Depending on the condition of your cabinets, you may be able to get away with using a paint that already has the primer included. This saves you from purchasing a separate paint and primer. 
  • You may be able to get a deal from your painting company if you have other rooms in your home that you’ve been wanting to get repainted at the same time. 

Cost to Reface Your Cabinets 

Refacing your cabinets is a great alternative when you want an entirely new look for your kitchen without completely replacing them. But it will certainly cost you more than simply repainting. Refacing cabinets is a common choice for homeowners with laminate or cheaper surfaces in poor condition so they can’t be repainted. 

Conclusion on How Much Does it Cost to Paint Kitchen Cabinets

Repainting your kitchen cabinets by yourself will be less expensive than hiring a professional painting contractor. However, painting kitchen cabinets can be quite a tedious task that could leave your kitchen taken apart for days at a time. Hiring a skilled painting company will ensure your cabinets turn out with a smooth and quality finish. The team at Boise Home Painting gets the job done quickly and efficiently and can make your cabinets look new again. No matter where you live in the Treasure Valley, our experienced painters are happy to come out and give you a free quote. Your dream kitchen may be closer than you think.

Request A Free Quote

Matte Finish vs Satin and Gloss Finish

Categories Painting

Alkyd Paint: What is it and When to Use It 

What Is Alkyd Paint?

There are all different kinds of paints, used for different kinds of projects. Before you start any painting project, it’s always smart to understand what type of paint will work best. Alkyd paints are created with a pigment, added to a solution of alkyd resin, and a petroleum-based solvent. The pigment gives the paint its color, and the binding agent keeps everything in place after application. Continue reading to learn more about when it’s best to use alkyd paint and when a different type of paint may be a better choice. 

If you live in the Boise area and need help with your interior or exterior painting, contact us to get your free quote! We serve Meridian, Caldwell, and Eagle too!

What is Alkyd Paint? 

Alkyd paint is an enamel finish that has a similar consistency to oil paint. They usually have thinners made from either alcohol or mineral spirits. However, alkyd quick-dry primers and topcoats can’t be thinned with mineral spirits. The type of thinner used will control how the paint flows as well as drying time. 

Is Alkyd Paint Oil Based? 

Even though alkyd paint is often referred to as oil-based, it doesn’t actually contain oil or behave much like an oil-based paint either. Because it is composed of chemical binders and thinners like oil paint, people often get confused. In alkyd paint, the binder is usually some type of synthetic resin.

What is Alkyd Paint Used For? 

Because the binding agent in alkyd paint is a strong resin, it can be costly and slightly toxic. For these reasons, it typically isn’t used for interior walls, with the exception of high-traffic areas such as hallways and bathrooms. Alkyd primers or paints are commonly used to coat metal and wood as well as doors, trim, and cabinets. 

When Not to Use Alkyd Paints 

Alkyd paints are certainly not considered the most versatile paints. Latex paints are hands down the most popular paint among professionals and homeowners alike. Alkyd paint is more toxic for the environment than water-based paints and can be more complicated to apply as it has a tendency to splatter easily. 

When Professionals Use Alkyd Paint 

Professional painters often turn to alkyd paints because they help level out uneven surfaces, hide roller or brush marks, and are more durable than other paints. Alkyd paints are most commonly used on commercial wall covering, trim, furniture, cabinets, and floors. The resin binder is also resistant to moisture which makes it a great paint choice for the kitchen. It’s an excellent option for trim and cabinets due to the fact that it holds its sheen much longer than other types of paint. 

Alkyd vs. Oil Paints 

Alkyd paint is known to be tougher than oil-based paint and is commonly found to adhere well to wood and metal. When dry, it hardens to a finish that compares to semi-gloss. When you want a smooth, durable finish, alkyd paints cure to a finish that is unmatched by both latex and oil. 

Alkyd Paint: What is it and When to Use it Conclusion 

Alkyd paint is scuff-resistant, goes on smoothly, and has excellent coverage. On the other hand, it takes longer to dry, requires paint thinner to clean up, and can become brittle once dried. While it makes for a beautiful finish, there are certainly times a latex paint makes more sense. If you’re starting a project and aren’t sure what type of paint is most beneficial or you simply want to turn it over to the professionals, contact Boise Home Painting. Our team of experts is committed to top-quality work and knows what they’re doing. For a high-quality painting job done efficiently, you can count on Boise Home Painting.


Call Now