Categories interior painting

Do You Paint Walls or Trim First? The Step By Step Guide

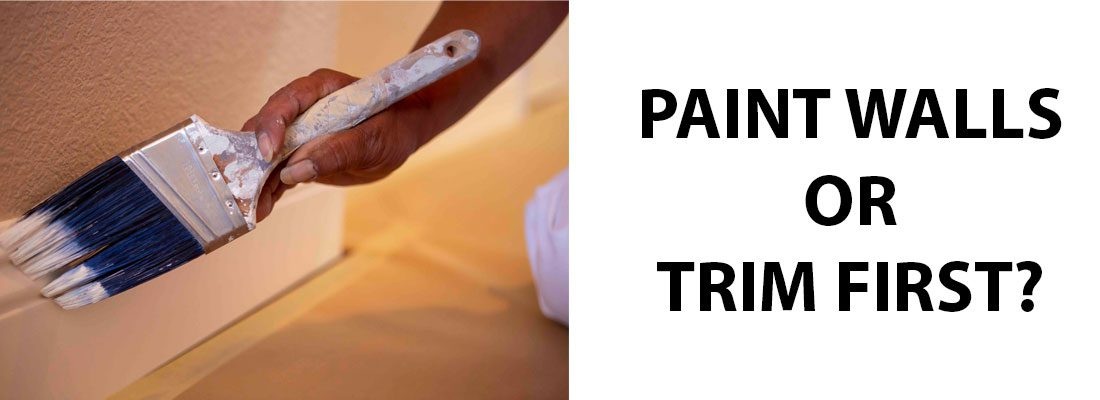
Paint Walls or Trim First?

Do you paint walls or trim first? It’s a classic question that many homeowners and DIY painters face when beginning a room makeover. The order you choose can impact not only the final look but also the ease of the project. Whether you’re aiming for crisp, clean lines or a faster paint job, understanding the pros and cons of each approach will help you get better results. 

If you’re looking for professional painters in Boise, Boise Home Painting can help. Our team of professional contractors serves customers across the Treasure Valley, offering high-quality painting that lasts. 

Get Free Paint Quote

Should You Paint or Install Floors First?

Should You Paint Baseboards or Walls First?

Before painting a room, you might be asking, “Do you paint trim or walls first?” It’s a common question, especially if it’s your first time tackling a painting project. If your baseboards are already in good shape, just tape them off and paint the walls. But if they need to be painted, most pros recommend painting the trim first because:

  • It’s easier to tape off trim than walls. Once the trim is dry, you can easily tape along the crisp edge of trim to protect it while painting the walls. 
  • There’s less risk of smudging finished walls. If you paint the walls first, you risk accidental smudges while painting the trim. 
  • Trim usually needs more precision, so it’s better to focus on that with a clean slate. 
  • Baseboards often need more prep. You can patch, sand, and prime them without worrying about damaging freshly painted walls. 

Once the trim dries completely (ideally 24 hours), you can tape it off and paint the walls. This will give you the cleanest lines while avoiding the need for constant touch-ups.

Pros and Cons of Painting Trim First

While every method has its pros and cons, most professionals start by painting the trim first. The benefits of this include:

  • Cleaner, sharper lines: It’s easier to tape along the straight edge of the trim after it’s painted and dried, which results in crisp lines where the trim meets the wall. 
  • Faster wall painting: Once the trim is done and taped off, you can roll the walls quickly without worrying about precision near the baseboards or moldings. 
  • Less risk of drips: Painting the trim first avoids accidentally dripping trim paint on fresh walls. 
  • Allows for proper trim prep: Trim often needs filling, sanding, and priming, which can be messy. Doing this first allows you to properly prep the trim without damaging painted walls. 

While painting the trim first is what most professionals prefer, there are a few downsides, including:

  • Requires more patience: You need to wait for the trim to dry completely–usually at least 24 hours–before taping it off and painting the walls. 
  • Risk of scuffing trim: While painting walls, especially in tight corners, it’s still possible to bump into the trim, which will require touch-ups. 
  • Can be more noticeable: If you rush or use low-quality tape, uneven lines along the trim can stand out more when walls are painted last. 

Pros and Cons of Painting the Walls First

While most pros recommend painting the trim first, there are some benefits to starting with the walls, including:

  • Faster start: You can roll out the walls immediately without worrying about damaging finished trim. 
  • More forgiving for DIYers: If you’re new to painting, starting with walls lets you focus on broad strokes without worrying about tight corners. 
  • Touch-ups: If you accidentally get wall paint on the trim, it’s not a big deal. You’ll be painting the trim last, so any drips will get covered. 

Some of the disadvantages of starting with the walls first include: 

  • Harder to get crisp lines: Painting the trim after the walls often requires careful hand-brushing or precise taping, which can be tricky. Your lines may not be as crisp. 
  • Risk of smudging the walls: When painting the trim last, it’s easy to accidentally brush onto your finished wall surfaces. 
  • Taping walls can be tricky: Protecting the walls while painting can be harder than taping off trim first. Walls aren’t always perfectly straight or smooth at the edges. 

How to Paint a Room

Supplies you’ll need:

  • Drop cloths or plastic sheeting
  • Painter’s tape
  • Paint
  • Primer (if needed)
  • Paint roller
  • Angled brush for cutting in
  • Paint tray and liners
  • Sandpaper or sanding block
  • Putty knife and patching compound
  • Ladder or step stool
  • Damp rags for cleanup

Step 1: Prepare the Room

Start by moving furniture to the center of the room, or out of the way completely. Cover floors and furniture with drop cloths, and remove outlet covers and light switch plates. Clean the walls with a damp cloth to remove dust and grime. Fill holes or cracks with spackle. Once dry, sand it smooth. 

Step 2: Paint the Trim

Paint the trim and baseboards, using a paint with a semi-gloss finish. This will last longer against accidental kicks and bumps and is easier to clean. Once the paint has dried for at least 24 hours, apply painter’s tape along the trim, baseboards, window frames, and fixtures. Press the tape firmly to prevent bleeding. 

Step 3: Paint the Ceiling

After you paint the trim, many professionals recommend painting the ceiling. This will help you avoid drips and splatters from on your freshly painted walls. Plus, you can work on the ceiling while the trim is still drying. Start by cutting in along the edges of the ceiling. Use a ⅜ in nap roller and flat paint to paint the ceiling, rolling in the same direction. Roll in the opposite direction for a second coat. 

Step 4: Cut In the Edges

Use an angled brush to carefully paint along ceilings, corners, trim, and baseboards. This step is called “cutting in.” It creates a border for easy rolling. Work in sections so the edges stay wet as you roll. 

Step 5: Paint the walls

Pour paint into a tray and load the roller evenly. Maintain a wet edge to avoid lap marks. Two coats are standard for even coverage, but make sure you wait the recommended drying time between coats, usually 2 to 4 hours for water-based paints and at least 24 hours for oil-based paints. 

Touch up any missed spots or thin areas as needed. For cleaner lines, remove the painter’s tape carefully while the paint is still slightly tacky. 

Step 6: Clean up

Once you’ve finished the room, wash brushes and rollers immediately. Dried paint can be difficult to remove. Water-based paints can be cleaned with water, but you’ll need a solvent like turpentine or paint thinner to clean oil-based paints from your brushes. When the paint is completely dry, you can reattach outlet covers, switch plates, and hardware. 

Enamel vs Latex Paint

How to Paint Trim Once the Walls Have Been Painted

If the walls have already been painted, wait until they’ve had a chance to dry for at least 24 hours. Then, start by cleaning the trim. Wipe it down to remove dust, dirt, or oils. Clean surfaces allow the paint to stick better. Once the trim is all clean, carefully tape where the trim meets the wall, and press down firmly. 

Lay down drop cloths or plastic to protect the floor from drips. Then, using a high-quality angled brush, paint the trim. Load the brush lightly so the paint doesn’t drip. Start with long, smooth strokes, working along the edges and corners. Paint in the direction of the trim grain. When finished, pull the tape while the paint is still slightly wet. 

How to Paint Walls

Nothing is more frustrating than spending your time painting only to have ugly lap marks or drips left behind. Luckily, there are some tricks you can use for a better result. First of all, don’t overload your roller. Thin, even coats work best and dry more quickly. To avoid lap marks, maintain a wet edge. This means overlapping the previous stroke with the current one while still wet. 

When you can’t maintain a wet edge, feathering out the edges with thin strokes and a nearly-dry roller can help you avoid the dreaded lap marks. Once you reload the roller, start by painting the feathered edges. 

How to Get Clean Lines

Clean edges are not just for the professionals. If you want clean lines on your DIY paint project, follow these tips:

  • Use high-quality painter’s tape. Go for brands like FrogTape, which has special paint-blocking technology, or 3M ScotchBlue. Avoid cheap tape, which doesn’t seal well. 
  • Prep the surface properly. Make sure walls and trim are clean and dry. Dust and grease can stop the tape from sticking. 
  • Press the tape firmly along the edge. Use a putty knife or fingernail to seal it tightly. 
  • Use the “Sealing the Tape” trick. After applying the tape, paint along the tape edge with the same color as the base wall or trim. Let that coat dry before painting your final color. Any paint that bleeds will match the base color. 
  • Paint carefully along edges. Don’t overload your brush or roller near the taped area. Use smooth, even strokes. 
  • Remove the tape at the right time, while the paint is still slightly wet. Pull it back at a 45-degree angle for a sharp, clean edge. If the paint has fully dried, lightly score the edge with a utility knife before removing. 

Should You Use Primer?

Primer is a coating applied before painting, but is it necessary? Not always. If you’re working on bare or new surfaces like drywall or wood, you’ll need a primer to seal the surface so the paint absorbs evenly. If you’re painting over a stained or dark wall, primer can help block the color from showing through. Additionally, high-moisture areas like bathrooms, kitchens, or basements can benefit from a moisture-resistant primer to prevent mold and peeling. 

However, you might not need a primer if:

  • Your walls are in good condition.
  • You’re using a similar color.
  • You’re using a product with paint and primer in one.
  • You’re just touching up or doing a small project. 

Where to Buy Paint Supplies in Boise

Looking to buy paint supplies in Boise? Check out these quality painting supply stores that will have everything you need:

  • Sherwin-Williams: 7160 Fairview Ave., Boise, ID 83704
    • Sherwin-Williams offers expert color matching, paint samples, and both residential and professional-grade products. 
  • Miller Paint: 7440 W Lemhi St, Boise, ID 83709
    • A regional PNW brand with a Boise branch, Miller Paint offers premium interior and exterior paints. 
  • Paint Life Supply Co.: 4618 W State St., Boise, ID 83703
    • Paint Life Supply Co. is a painter-focused store with quality tools, expert advice, and resources for both pros and DIYers. 

Conclusion

So do you paint walls or trim first? The answer depends on who you’re talking to, but most experts agree that it’s best to paint your trim first. 

If you’re looking for expert painters in the Treasure Valley, Boise Home Painting is here to help. We offer interior and exterior painting services for customers in Boise and the surrounding areas. We serve the entire area with exterior and interior painting for both residential and industrial spaces, including Meridian, Nampa, and Eagle. We also do epoxy flooring. Contact us today for an estimate! 

Get Free Paint Estimate

Should Caulk Before Or After Painting?

Categories interior painting

Can You Paint Apartment Walls in Idaho? 

Can You Paint Apartment Walls?

With a sea of apartment complexes being built on every corner it seems, it makes sense that people often wonder: can you paint your apartment walls in Idaho? As a tenant in this beautiful state, it’s important to understand the rules and regulations surrounding painting interior apartment walls. Whether you wish to infuse your living space with personality or simply refresh its appearance, we’ll explore the guidelines and considerations to make sure you can achieve your vision while staying within the bounds of your rental agreement and local laws. 

If you live in the Boise area and you need someone to paint your apartment walls, we can help! We’re based in Boise and serve the entire Treasure Valley including Meridian, Nampa, Caldwell, and Kuna. Click the button below to get a free estimate and $500 off!

Get Free Quote

Satin vs Matte vs Gloss Paint

Can You Paint Apartment Walls in Idaho? 

In Idaho, whether you can paint your apartment walls depends on your lease agreement and the specific policies of your landlord. If your lease explicitly prohibits alterations or painting without permission, then you should not paint the walls without getting written consent from your landlord. 

If your lease does not mention anything about painting, it’s still best to communicate with your landlord and seek permission before proceeding. Openly discussing your intentions can prevent potential conflicts and ensure that both parties are on the same page. 

If your landlord grants you permission to paint, follow any conditions or guidelines they provide. Additionally, be prepared to return the walls to their original condition before the end of your tenancy if required by your landlord. 

Landlord Painting Requirements in Idaho 

In Idaho, landlord-tenant laws and regulations govern the rights and responsibilities of both landlords and tenants when it comes to property maintenance, including painting requirements. While specific rules may vary depending on the city or county, certain general principles apply to landlord painting requirements in Idaho. 

  • Property Maintenance: Landlords in Idaho are generally responsible for maintaining their rental properties in a habitable condition. This includes ensuring that the property meets health and safety standards and is well-maintained for the duration of the tenancy. 
  • Wall Paint: Landlords are typically responsible for painting the walls of the rental unit when necessary to maintain its habitability. This means that if the walls are in poor condition, chipped, or damaged, it is the landlord’s duty to address these issues, including repainting.
  • Tenant Alterations: In some cases, a tenant may be allowed to paint the walls with the landlord’s written consent. Landlords may specify certain conditions, such as the use of specific paint types or colors, and tenants should adhere to these requirements to avoid any conflicts. 
  • Reversion to Original Condition: If a tenant is given permission to paint the walls, the landlord may require the tenant to return the walls to their original condition before the end of the tenancy. This might involve repainting the walls to their initial color or repairing any damages caused during the painting process. 
  • Security Deposit: Landlords in Idaho often collect a security deposit from tenants at the beginning of the tenancy. If a tenant damages the walls through unauthorized painting or fails to restore them to their original state, the landlord may deduct the cost of repairs or repainting from the security deposit. 
  • Professional Repairs: Landlords should typically employ professional painters or contractors to carry out significant painting projects, especially if it’s part of the property maintenance and not initiated by the tenant. 

How Long Between Coats Of Paint?

Why You Shouldn’t Paint Your Apartment 

Oftentimes, landlords hire a professional painting company to paint the interior walls of the apartments they are renting out. This is because they know a painting contractor will use quality paint, not cut corners, and will follow the proper steps for excellent results. Renters don’t always have the same motivation so the spackling of dents and holes doesn’t get taken care of and the job may appear sloppy and rushed. 

It’s always best to consult your landlord before jumping in and painting your apartment walls. In some instances, painting without permission can be considered an act of vandalism as it could be damaging someone else’s property. Your landlord could choose to withhold a portion of your deposit or take even further action. 

Can I Be Evicted for Painting My Apartment?

While eviction is a possibility, it isn’t likely to happen due to painting your apartment without permission. However, most rental agreements include clauses that prohibit tenants from making significant alterations to the property without the landlord’s written approval. Painting the walls is typically considered a significant alteration, as it can affect the appearance and condition of the unit. 

Things to Consider Before Painting Your Apartment 

We recommend you thoroughly read through your lease agreement, looking for any mention of making modifications to your apartment. If you don’t find anything about alterations in your contract, you are probably ok to go ahead and start painting. Below are a few things you should keep in mind before you start: 

  1. Contact Your Landlord 

It’s always better to be safe than sorry. We highly recommend touching base with your landlord before ever taking a paintbrush to your walls. You always want to maintain a good relationship with your landlord and showing respect by having open communication is a great way to do that. 

  1. Return Walls to Their Original Condition and Color 

If you’ve gotten the thumbs up from your landlord to start painting, remember that you will probably have to repaint to the original color before moving out. There will typically be something stated in the rental agreement saying that the property must be restored to its original color and condition. This protects the landlord from the tenant who may have very unique or bold color choices. 

  1. Choose Your Color Carefully 

Color is a very individual preference and while you may love a bright yellow, maybe the next tenant won’t. Most apartments or rental properties have white or cream-colored walls because they make the space appear larger and pretty much go with everything. If you stay with a more neutral tone for your interior walls, you’re less likely to be hearing from your landlord, complaining about your color choice. 

What if Your Lease Doesn’t Mention Anything About Painting? 

If your lease agreement doesn’t specifically mention anything about painting or alterations to the property, it’s still best to clarify the situation with your landlord before you move forward with any painting projects.

While the lease may not explicitly prohibit painting, it’s a smart move to seek permission from your landlord to avoid any potential issues or misunderstandings. 

Even if the lease does not have explicit clauses about painting, it’s considered good practice to communicate with your landlord and inform them of your intention and desire to paint the walls. Some landlords may have specific preferences or requirements regarding the color or type of paint used, and they may appreciate being informed beforehand. 

What if the Walls Are In Bad Shape? 

If the walls of your apartment are in poor condition and require painting to improve their appearance, it may be tempting to take matters into your own hands and paint them without first seeking permission. Remember that it’s not your responsibility as a renter and taking action could lead to frustration in the long run. 

In situations where the walls are in bad shape, it’s generally best to report the issue to your landlord or property management immediately. They are responsible for maintaining the property and addressing maintenance concerns, including wall repairs and painting if necessary. 

Can You Paint Apartment Walls in Idaho Conclusion 

The ability to paint apartment walls in Idaho is subject to the terms and conditions of your lease agreement and the willingness of your landlord to grant permission. To avoid any potential conflicts or violations, it’s always a good idea to seek written consent from your landlord before undertaking any painting projects. At Boise Home Painting, we understand the importance of transforming living spaces and commercial properties to reflect your unique style. With years of experience in both residential and commercial painting, our team is well-equipped to handle all your painting needs throughout the Treasure Valley. From selecting the perfect colors to delivering professional and precise work, we take pride in enhancing the beauty and ambiance of your space. We also do exterior painting and cabinet refinishing!

Get Free Estimate

How To Paint With A Roller

Categories interior painting

Can You Paint Over Wallpaper and Should You? 

Can You Paint Over Wallpaper?

If you’re considering updating the walls in your home, you may be wondering, “Can you paint over wallpaper”? Perhaps you’ve inherited wallpaper that doesn’t quite match your style, or maybe you’ve grown tired of a pattern that once seemed charming. Whatever the reason, the good news is that painting over wallpaper is often a viable solution for transforming a room’s look and feel without the need for a time-consuming removal process. However, before you start painting over your wallpaper, it’s essential to understand the pros and cons of this approach and learn some tips to ensure that your results are long-lasting and visually appealing. In this post, we’ll explore whether painting over wallpaper is a good idea, and offer some helpful advice to help you achieve a professional finish. 

Get Free Estimate

Matte vs Satin and Gloss Finish

When Not to Paint Over Wallpaper 

While painting over wallpaper can be a convenient and cost-effective solution for updating your room’s decor, there are certain situations where it’s not advisable. Here are some instances where you should avoid painting over wallpaper: 

  1. Damaged or peeling wallpaper: When your wallpaper is already damaged or peeling, painting over it will only exacerbate the problem. The paint may not adhere well to the damaged surface, leading to a patchy or uneven finish. In this case, it’s best to remove the wallpaper and repair the wall before applying new paint.
  2. Vinyl or glossy wallpaper: Wallpaper that has a vinyl or glossy finish is very difficult for paint to adhere to. This can result in peeling or bubbling over time, making your paint job look unsightly. If you have vinyl or glossy wallpaper, it’s best to remove it before painting.
  3. Textured or embossed wallpaper: If your wallpaper has a textured or embossed surface, painting over it may not be the best option. The texture or embossing may show through the paint, creating a bumpy or uneven appearance. In this case, it’s best to remove the wallpaper and apply paint directly to the wall.
  1. Outdated or unattractive wallpaper: If your wallpaper is outdated or unattractive, painting over it may not be enough to achieve the desired look. In some cases, it may be more cost-effective and visually appealing to remove the wallpaper and start fresh with a new coat of paint.

To sum it all up, if your wallpaper is damaged, has a vinyl or glossy finish, is textured or embossed, or is outdated or unattractive, it may not be a good idea to paint over it. Instead, you may need to remove the wallpaper and prepare the wall before applying new paint. 

When to Paint Over Wallpaper 

Now that we’ve discussed when you shouldn’t paint over your wallpaper, lets go over situations when it makes the most sense: 

  1. The wallpaper is in good condition: If your wallpaper is in good condition with no signs of damage, peeling, or bubbling, you may be able to paint over it. This can be a convenient way to update the look of a room without having to go through the time-consuming and messy process of removing wallpaper.
  2. The wallpaper is a neutral color or pattern: When your wallpaper has a neutral color or pattern that complements the rest of the room’s decor, painting over it can be a great way to refresh the room’s look without making significant changes. A fresh coat of paint can help modernize the space and give it a new look and feel.
  1. The wallpaper is properly primed: Painting over wallpaper that has been properly primed can be a viable option. Proper priming ensures that the wallpaper’s surface is smooth and even, allowing paint to adhere well and providing a good base for a professional-looking finish.
  1. You don’t want to remove wallpaper: Sometimes you just don’t want to go through the time, effort, and expense of removing your old wallpaper. This is when painting over it looks increasingly appealing. This is especially true if you’re not planning to live in your current home for an extended period or want a quick, cost-effective solution.

If you do come to the conclusion that you want to move forward with painting over your current wallpaper, it’s essential to follow the proper preparation steps and use the right products to ensure a smooth finish. 

How Long Should you Wait Between Coats of Paint?

Supplies You’ll Need to Paint Over Wallpaper 

To be successful at any DIY project, it’s important to procure the proper supplies beforehand. We’ve compiled a list of the essentials when it comes to painting over wallpaper: 

  • Paint
  • Primer
  • Sandpaper
  • Paintbrushes and rollers
  • Painter’s tape
  • Drop cloths
  • Cleaning supplies

Remember to choose only high-quality products that are appropriate for the surface you’ll be painting. This will ensure that your finished product looks professional and lasts for years to come. 

How to Remove Wallpaper 

We have to warn you that removing wallpaper can be an extremely tedious task. However, it’s very necessary in many cases to achieve the smooth, professional look you’re wanting. Below are the steps to follow to properly remove wallpaper before repainting the surface: 

  1. Remove the wallpaper’s top layer: Use a putty knife or scraper to loosen and remove the top layer of the wallpaper. This layer is usually made of vinyl or paper and should come off easily. If the wallpaper is particularly stubborn, you can score it with a wallpaper scoring tool to help the wallpaper removal solution penetrate it.
  2. Apply wallpaper removal solution: Apply a wallpaper removal solution to the wallpaper’s backing, following the manufacturer’s instructions. This will help soften the adhesive and make it easier to remove the wallpaper.
  3. Scrape off backing: Use a putty knife or scraper to remove the wallpaper backing. Work carefully to avoid damaging the wall surface underneath. If the backing is particularly stubborn, you can use a wallpaper steamer to help loosen it.
  4. Clean the wall surface: Once you’ve removed all the wallpaper, use a sponge and warm water to clean the wall surface thoroughly. If there’s any remaining adhesive, use a solution of warm water and vinegar to remove it.
  5. Sand the wall surface: Use sandpaper to smooth out any rough spots or imperfections on the wall surface.
  6. Apply primer: Once the wall surface is clean and dry, apply a high-quality primer.

How to Paint Over Wallpaper 

Painting over existing wallpaper can be a quicker and easier alternative to removing it entirely. Below are the steps we recommend you follow for the best results: 

  1. Clean the wallpaper surface: Before painting, make sure the wallpaper surface is clean and free of any dirt or debris. 2. Sand the wallpaper surface.
  2. Apply a wallpaper primer:
  3. Apply paint: Once the primer is dry, you can apply your paint of choice. Use a paint that’s suitable for the surface you’ll be painting and follow the manufacturer’s instructions for application. Be sure to use a paint brush or roller that’s appropriate for the type of paint you’re using.
  4. Apply a second coat: Depending on the quality and coverage of the paint, you may need to apply a second coat. Allow the first coat to dry completely before applying the second coat.
  5. Clean up: After you’ve finished painting, clean up any spills or drips and remove the painter’s tape. Allow the paint to dry completely before moving any furniture back into the room.

Where to Buy Wallpaper Removal and Paint Supplies in Boise 

There are several really great options for buying painting and wallpaper removal supplies in the Treasure Valley. We’ve put together a list of just a few of our top choices for your convenience:

  • Sherwin-Williams: They have multiple locations in the Boise area, including a store on W Overland Rd and another on S Broadway Ave.
  • Home Depot: There are multiple Home Depot locations in the Boise area, including one on W Franklin Rd and another on N Milwaukee St.
  • Lowe’s: Lowe’s is another home improvement store that offers a variety of painting supplies, including paint, brushes, and rollers. There are multiple Lowe’s locations in the Boise area, including one on W Overland Rd and another on N Eagle Rd.
  • Boise Paint and Glass: Boise Paint and Glass is a locally-owned paint supply store that carries a large variety of painting tools and supplies. They also have multiple locations in the Boise area, including a store on W Idaho St and another on E Fairview Ave.

Can You Paint Over Wallpaper Conclusion 

While it’s certainly possible to paint over wallpaper, it’s best to recognize when that’s actually the best option and when it’s more appropriate to go in a different direction. If you live in the Boise area and you feel it’s time to refresh the interior or exterior of your home with a fresh coat of paint, look at Boise Home Painting. We are a family-owned business that has years of experience in the Treasure Valley. We will be happy to give you an estimate and free color consultation to make upgrading your paint as easy as possible.

Get Free Estimate

Should You Paint Or Install Floors First?

Categories interior painting

How To Paint Walls With A Roller: Step-By-Step Guide

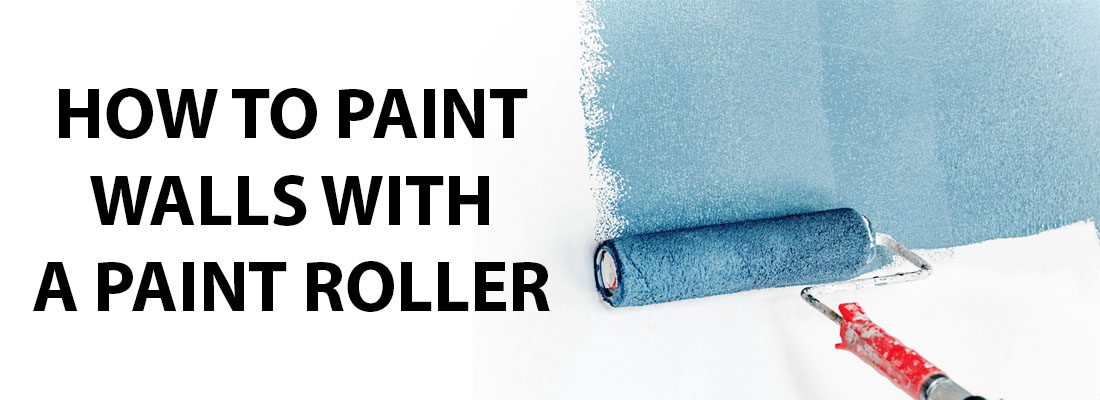
How to paint walls with a paint roller

Why should you learn how to paint walls with a roller? For starters, it’s a super easy and efficient way to freshen up the look of a room. Before you get started, it’s important to prepare your interior walls and prime them so the paint will adhere better. We’ll also go through the details cutting the edges of the walls and fill in any holes or cracks. We’ll go over all of this in more depth below to make it easy for you. Follow the steps below to learn how to paint walls with a roller.

Request A Quote

How To Use Black Ceiling Paint

Prepping to paint walls with a roller

Before you start painting your walls, you’ll need to do the necessary prep work. Part of that is having all the right materials. Below is a list of everything you’ll need to paint your walls with a roller and do all the right preparation: 

  • Paint roller frame 
  • Paint roller cover 
  • Paint 
  • Primer 
  • Spackle 
  • Sandpaper 
  • Soap and water 
  • Newspaper or cardboard 
  • Paint tray 
  • Paint brush

Cleaning the walls

Start by cleaning the walls with a damp cloth to remove any dust and dirt. If you are painting over glossy or semi-gloss paint, use a light sandpaper to dull the finish. You’ll want to start by removing any dust, cobwebs, and dirt from your walls. You can do this with a vacuum, a damp cloth, or a damp sponge. If the walls are heavily soiled, use a mild soap and water solution to clean them. Make sure you rinse the walls with clean water and let them dry completely before painting. 

Sanding

Next you’ll need to use a fine sandpaper to remove any bumps or imperfections in the surface of the walls. Fill in any holes or cracks in the walls with spackle or other appropriate filler. Once you can see that the walls are completely dry and smooth, apply a coat of primer before painting. This will help you ensure an even and professional finish.

Priming the walls 

Prime the walls with a good-quality primer. This will help the paint adhere better and create a smooth surface. When you start, prepare the wall surface by filling any holes or cracks with spackle and sanding the area smoothly. Apply a coat of primer to the wall using a paint roller. Make sure to roll the roller in a “W” pattern, starting at the top of the wall and working your way down. You’ll need to let the primer dry for at least two hours. Once it’s dry, you can apply a second coat of primer, if necessary. Again, use a paint roller and apply it in a “W” pattern. Let the second coat of primer dry for at least two hours before painting.

Should You Sand Between Coats of Paint?

Cut in the edges and fill in the holes

Use a brush to cut in the edges of the wall, such as around the ceiling, baseboards, door frames, and windows. Then you’ll need to fill in any holes or cracks with spackling compound or caulk. Don’t forget to let the compound dry before continuing.

Prepare the roller

Pour the paint into a paint tray and insert a roller cover onto the roller. Dip the roller into the paint and roll it off onto the tray to evenly spread the paint. Once you’ve done this, you can start rolling the paint onto the wall. Start in a corner of the room and roll the paint onto the wall. Move the roller in a “W” pattern to ensure even coverage. Do you notice a pattern here? Painting in a “W” pattern is key. 

Don’t forget to backroll

To back roll with a paint roller, start by painting the surface with an up-and-down motion. Then, use the roller to go over the area in a crisscross pattern from one side of the room to the other, and then back again. This will help to spread the paint evenly and eliminate any brush marks or lines. You don’t NEED to backroll but we recommend you do because it helps your paint job last longer. We backroll on every paint job we do. If you don’t, your paint will look noticeably faded after just a few years. 

Cleaning up after painting with a roller

When you’re finished painting, remove the roller cover and wash it with soap and water. You can remove excess paint from the roller by rolling it onto a piece of newspaper or absorbent cloth. Next, rinse the roller in warm water to remove any remaining paint. Squeeze out any excess water and shake the roller to remove any excess paint that might be remaining. Once you’ve done that, place the roller in a bucket of warm, soapy water and let it soak for 15-20 minutes. Then you can rinse the roller off and spin it between your hands to remove any remaining paint. Lastly, hang the roller up or lay it on a towel to dry.

Places to buy your paint supplies in Boise

Here’s a list of places where you can purchase everything you need to paint walls with a roller:

  1. Boise Paint & Supply
  2. True Value 
  3. The Home Depot 
  4. Lowe’s 
  5. Sherwin-Williams 
  6. Ace Hardware 
  7. Do It Best Hardware 
  8. Idaho Paint and Supply Company

Conclusion on how to paint walls with a roller

Learning how to paint walls with a roller isn’t difficult. It just takes some time, the right materials, and following the right steps. But it is a lot of work. That’s why a lot of people decide to hire a professional painter. We can do that for you. In fact, we’ll give you a free estimate if you live in the Boise area. We serve everywhere from Boise to Meridian, Nampa, Eagle, and Caldwell

Free Estimate

Matte Finish vs Satin and Gloss Finish

Categories interior painting

How Much Does it Cost to Paint Kitchen Cabinets? 

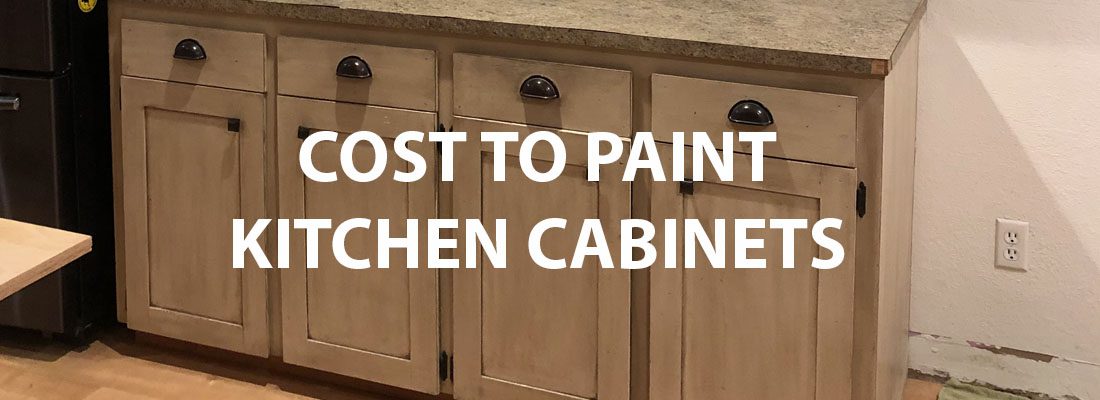
Cost To Paint Kitchen Cabinets

Giving your cabinets a fresh coat of paint is one of the most cost-effective ways to give your kitchen a fresh new look. So how much does it cost to paint kitchen cabinets? Repainting your cabinets will be a much less expensive project than resurfacing or replacing them. In this article, we’ll discuss the cost of painting your cabinets as a DIY compared to hiring a professional as well as ways to save you money in both instances.

If you live in the Boise area and need a professional painter to paint your kitchen cabinets, we’ll give you a free quote! We serve the entire area including Meridian, Boise, Eagle, and Nampa!

Free Estimate

Boise Cabinet Painting

How Much Does it Cost to Paint Kitchen Cabinets? 

The cost to repaint your kitchen cabinets may be less expensive than you think. On average, you can expect to pay somewhere between $400-$1300 depending on the quality of paint and the size and layout of your kitchen. This cost is mainly for labor but also includes the paint and other supplies. The national average is roughly $750 per kitchen. Because having your kitchen cabinets painted won’t break the bank, it remains one of the most popular kitchen renovations to up the value of your home.

What Goes Into Cabinet Painting 

There’s a fair amount of prep work that goes into painting your kitchen cabinets if you are attempting to do it yourself. It will pay off in the long run if you take the time beforehand to gather all the necessary materials and give yourself plenty of time. Plan on several days to complete the project. Always wear the appropriate safety gear and remember to open your windows for proper ventilation. 

Step 1. Determine the Cabinet’s Condition 

Surfaces that are already painted can be painted again but only if the existing paint is in good condition. If not, the old paint will need to be removed. This may require stripping products and some extra sanding to remove the old paint completely. 

While assessing the condition of your cabinets, you may decide that some doors need to be completely replaced rather than repainted. You’ll need different supplies and materials depending on what prep work your cabinets need. 

Step 2. Remove Dust and Grease 

Before applying any primer or paint, it’s important to make sure your cabinets have been thoroughly wiped down to remove all grease, dust, and dirt that has built up.

Step 3. Remove the Cabinet Doors 

Your next step will be to remove the doors, drawers, and hardware. It’s a good idea to label each piece with painter’s tape to eliminate guesswork when it comes time to put everything back together. Place the hardware in plastic bags and label where they go as well. 

Because there will be sanding taking place during the process, you’ll want to empty your cabinets at this time. This way you won’t have to wash every dish after your project is completed. 

Step 4. Prep and Sand 

Use drop cloths to cover your countertops, appliances, and any other areas you want to protect from dust and paint. Use painter’s tape to protect areas on the wall along the edge of your cabinets. Next, sand all cabinet surfaces with a medium-grit sanding block. A scuffed-up surface will help your primer and paint adhere much more effectively. Use a piece of folded sandpaper to get in the nooks and crannies and corners of your cabinets. Wipe down all cabinet surfaces thoroughly to ensure no fine dust particles remain. 

Step 5. Prime 

Primer isn’t always necessary. However, in this case, we feel priming is an important part of the process. Primer not only covers imperfections but also provides the best surface for paint to adhere to. Allow plenty of time for the primer to dry before moving on to painting. 

Step 6. Paint 

When applying paint to your kitchen cabinets, you can either use a roller or a brush. If you’re a little more advanced and have access to one, a paint sprayer is also an excellent option. Start by painting your cabinet frames, then the backs and fronts. 

Step 7. Apply a Second Coat 

After allowing several hours for your first coat to dry, we recommend applying a second coat. It will definitely take more time but is well worth it for the extra coverage and protection it provides. 

Step 8. Reassemble Kitchen Cabinets 

Once you’re certain your cabinet surfaces are completely cured, you can reassemble the doors to the frame as well as replacing your hardware.

Do I Need to Prime Before Painting? 

How to Calculate the Cost of Painting Your Kitchen Cabinets?

We mentioned that several factors go into figuring out the cost of repainting the cabinets in your specific kitchen. Let’s discuss the most common factors in detail: 

  • Paint Quality 

While there are a variety of paints designed specifically for kitchen cabinets, any high-quality paint should work. You’ll want to be sure to go with acrylic paint and avoid vinyl. Because kitchen cabinets need to be frequently wiped down, they do best with acrylic latex-based paint because of its durability. The higher quality your paint, the more expensive your cost will be. 

  • Painting Supplies Needed 

Deciding which painting method you want to use will play into your overall cost of the project because it will determine what tools you need to purchase. Spraying is an efficient method that gets the job 

done fast but may not be a tool you have on hand. Rollers and brushes are less expensive and are great for those hard to get into areas. Remember that whichever method you go with, you’ll need to purchase the primer, paint, drop-clothes, tape, paint pans, sandpaper, etc. These supplies add up to around $250-$550. When you hire a professional, they already have these materials. 

  • Kitchen Size 

Obviously, the fewer cabinets you have, the less expensive your job will be. So if you know you have a small kitchen, expect to pay less as opposed to a kitchen with larger square footage. 

  • Cabinet Surface Area 

If you have standard-size cabinets, a painting contractor may quote you a certain price per cabinet piece such as a drawer or door. However, they may charge you more if your cabinets have a larger surface area. It will commonly cost you more if your kitchen is difficult to maneuver in or has an excessive amount of corners. 

  • Labor Cost 

Labor costs will be a substantial amount of your cost. Depending on where you live, painting contractors may charge between $25-$50 per hour while others charge a base rate after calculating the total linear feet of your cabinets.

Cost to DIY and Cost to Hire a Professional 

DIY painting projects usually seem doable and typically save you a substantial amount of money. But it’s important to keep in mind that painting experts know the ins and outs of their trade and have the skills to do the job right. 

The bulk of your costs for a DIY project will come from purchasing paint and primer along with other painting supplies. A high-quality paint will run you about $55 per gallon. One gallon will generally cover 12 cabinet surfaces. To achieve the most professional look you can, you’ll want to purchase a quality primer as well. These two products combined will run you between $13 to $15 per cabinet surface. 

We know from experience that many homeowners attempt to paint their kitchen cabinets themselves and regret the time and money they put into it. They aren’t satisfied with the finished product. 

Repainting your cabinets is also a pretty big undertaking and will consume a few days of your time. Remember that time is money. Sometimes paying more to ensure you will love the end result while freeing up time for you to accomplish other things is simply the best way to go. 

A team of professionals will mean your kitchen is disrupted for a shorter period of time, will help protect the rest of your kitchen, and they will know the best paint or stain for your specific cabinets. 

Why You Should Get Your Kitchen Cabinets Repainted

We’ve already mentioned a few of the reasons why people might repaint their kitchen cabinets. However, below are the three main reasons:

  • Cost-effective renovation method 
  • Adds value to your home 
  • Updates and refreshes your style 

How to Save Money Painting Your Cabinets 

If you feel that hiring a professional painter is the best way to go but are worried it will cost too much, we have some helpful tips to save you money: 

  • Watch for deals or discounts offered by your local painting companies. 
  • Remove your cabinet drawers, door, and hardware by yourself. This will save you money on labor costs and is very simple to do.
  • Depending on the condition of your cabinets, you may be able to get away with using a paint that already has the primer included. This saves you from purchasing a separate paint and primer. 
  • You may be able to get a deal from your painting company if you have other rooms in your home that you’ve been wanting to get repainted at the same time. 

Cost to Reface Your Cabinets 

Refacing your cabinets is a great alternative when you want an entirely new look for your kitchen without completely replacing them. But it will certainly cost you more than simply repainting. Refacing cabinets is a common choice for homeowners with laminate or cheaper surfaces in poor condition so they can’t be repainted. 

Conclusion on How Much Does it Cost to Paint Kitchen Cabinets

Repainting your kitchen cabinets by yourself will be less expensive than hiring a professional painting contractor. However, painting kitchen cabinets can be quite a tedious task that could leave your kitchen taken apart for days at a time. Hiring a skilled painting company will ensure your cabinets turn out with a smooth and quality finish. The team at Boise Home Painting gets the job done quickly and efficiently and can make your cabinets look new again. No matter where you live in the Treasure Valley, our experienced painters are happy to come out and give you a free quote. Your dream kitchen may be closer than you think.

Request A Free Quote

Matte Finish vs Satin and Gloss Finish

Call Now