Categories Exterior Painting

How to Paint a Porch: The Step by Step Guide 

How To Paint A Porch

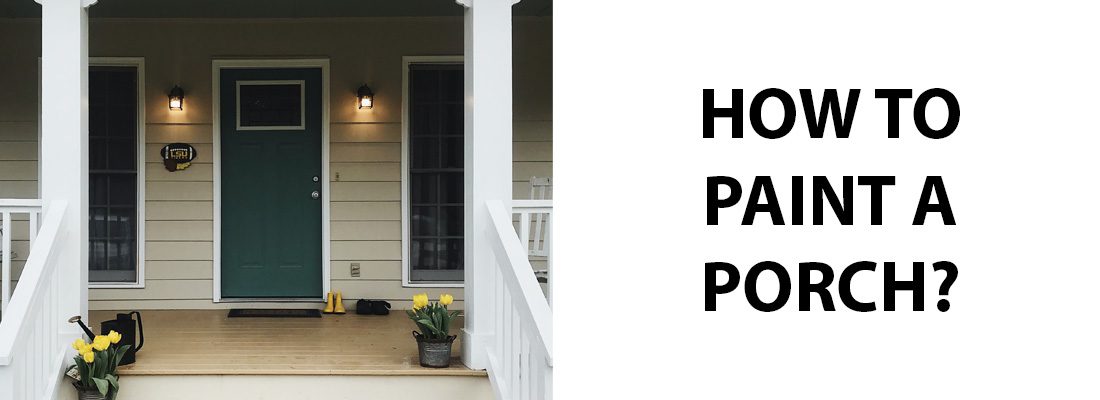
Most people don’t know the proper way to paint a porch. After all, it isn’t a space you commonly paint such as your bathroom or living room. It can often seem like a very tedious task, but knowing what steps to follow, along with the best paint for your job, can make for a simple project with results you can be proud of. 

If you live in the Boise area and need help with your exterior home painting or porch painting, we’ll give you a free quote! We serve the entire Boise area including Meridian and Eagle.

How to Paint a Porch 

When gearing up to paint your porch, there are some simple steps to follow to get started: 

  1. Remove Everything From Your Porch 

Your very first step should be to remove everything from your porch. This would include any furniture as well as decorations on your floor. Be sure to cover any items you don’t want to be painted but can’t remove, with a drop cloth for paint protection. 

  1. Thoroughly Clean the Area 

Once everything is removed, you’ll want to give your porch a good cleaning. Start by sweeping away any cobwebs or debris. You’ll need a smooth, clean surface before painting for the best results. Next, hose down the area, allowing plenty of time to dry before applying any paint. 

If you have a wooden porch, you’ll want to sweep away all dirt, paying special attention to cleaning between the cracks and crevices of the planks. 

  1. Apply Primer 

Once your porch is clean, it’s a good idea to prime before you start painting. If you’re working with a wood surface, apply two coats of primer with a roller. Allow at least 8 hours to dry. 

For concrete porches, apply only one coat of primer with a roller on an extension pole and also let dry for at least 8 hours. 

  1. Pick a Paint Color

Once you decide which color to go with, be sure to choose an exterior, porch-specific paint that is designed to withstand the wear and tear of foot traffic and can handle the outdoor elements. 

How to Paint a Wooden Porch 

If your porch has a wooden surface, clean and spray it down completely then give it at least 24 hours to dry. Once you’re certain the surface is dry, use a sander to help remove any existing paint. Remember to wear protective eyewear and a mask during sanding. After you’ve finished sanding, sweep away any residual dust from the surface. 

Next comes taping. Use high-quality painters tape to ensure your new paint doesn’t get onto the siding or trim of your home. Now that you have all your edges taped off, it’s time to apply an exterior primer. Pay attention to any debris the wind may blow into your fresh primers so it doesn’t stick to the primer as it dries. Depending on the outside temperature, you’ll need to let your primer dry from 2-8 hours before moving on. 

Now you can apply your paint of choice. Allow around 8 hours to dry before applying a second coat. 

How to Paint a Concrete Porch 

For a concrete porch you’ll still start with cleaning but you’ll want to use concrete chemicals for the best results. Safety needs to be a big concern during this part of the process so wear gloves and a mask for protection. After you’ve thoroughly scrubbed the concrete down with a scrub brush, spray with a hose or pressure washer and let it completely dry. This generally takes around 24 hours but will obviously dry faster on warmer days. 

Tape off any areas you don’t want paint to touch then start applying a concrete primer. After your primer has had a chance to dry, apply your paint of choice. Make sure you go with a concrete exterior paint. Exterior paints are designed to withstand harsh weather conditions and general activity. When finished, allow at least 24 hours for your paint to dry. 

Best Paint for Porches 

When painting a porch floor, you’ll want to choose a porch or deck paint that is designed for your specific porch surface. Concrete porches do well with low-luster acrylic latex paints. This paint is excellent at preventing scuffing, bubbling, cracking, and fading, and hides all those little imperfections. It’s also durable and stain resistant. For a wooden porch, we recommend Premium Advanced Deckover by Behr. It comes in dozens of colors and makes your wood splinter-proof. It may cost a little more but the fact that it’s mildew-resistant and long-lasting makes it well worth your money. Also, be sure to choose an exterior paint specifically made for horizontal surfaces rather than vertical ones for walls and trim. 

Cost to Paint a Porch 

Obviously, the size of your porch and the quality of paint you choose will play a large part in figuring out how much painting your porch will cost. On average, you can expect to pay around $2-$5 per square foot. Porches are usually around 150 square feet in size with a typical cost running around $525. Take the time to accurately measure your porch before purchasing paint so you’ll have a good idea of what you’ll be spending. 

Paint Ideas for Porches 

Because your porch is one of the first things people see when they pull up to your home, it can have a profound overall impact on its appearance. With that said, if your porch is looking run-down and dingy, it puts a negative spin on your curb appeal. And while your front porch can give a powerful first impression, don’t forget about your back porch. A back porch is an extension of your home as well as a place to create memories with friends and family. 

We’ve compiled a few of our favorite porch painting ideas that can add personality and style to the entryway of your home:

  • Go with a Contrasting Paint Color 

Painting your porch a contrasting color from the rest of your home is an excellent way to highlight this unique feature. The color you choose for your porch doesn’t need to match that of your house but needs to be a nice compliment. 

  • Have fun with Patterns 

A bold or playful pattern can be an attention-grabbing asset to any porch. From your classic checkerboard diamonds to stripes or stamped concrete, a pattern can dress up your porch with a fun and inviting element of style. Black and white will always be a popular duo. However, neutral or earthy tones of blue, gray, tan, and brown will always pair well with rock pillars or dark wood doors. 

  • Look to your Landscaping 

Don’t forget that your landscaping is a natural way to compliment your porch. You can draw in the bold floral colors of blossoms to enhance your porch’s beauty or keep a crisp and clean look while contrasting your white porch against crisp green foliage. 

How to Paint a Porch Conclusion 

Painting your porch isn’t a complicated process. Follow the steps focused on above and you’ll be thrilled with the results of your labors. However, if you prefer to leave your porch painting to the professionals, contact Boise Home Painting. Our skilled team of painters has years of experience throughout the entire Treasure Valley. We pay attention to the details and only use the best quality products to ensure our customers are more than satisfied with the finished product. 

Categories Exterior Painting

Can You Paint Pressure Treated Wood?

Can you paint pressure treated wood?

Pressure treated wood is used for numerous outdoor projects. Because it’s been treated with chemicals, people often wonder, “Can you paint pressure treated wood?” While you most certainly can paint pressure treated wood, it’s important to be sure it’s had proper time to dry as well as knowing which kind of paint will adhere best. Continue reading to learn the ins and outs of painting pressure treated wood so your next outdoor project will be a success. 

What is Pressure Treated Wood? 

Pressure treated wood is simply wood that’s been treated with chemicals to protect it from moisture and insects. The chemicals it’s treated with don’t necessarily make the wood stronger but prevent it from prematurely rotting. Wood structures that will be constantly exposed to moisture or the elements are often built with pressure treated wood. Fences, playgrounds, decks, railings and playground equipment are typically constructed with pressure treated wood to hold up better over time. 

When to Paint Pressure Treated Wood 

The most important thing to consider when painting pressure treated wood is drying time. It may take up to 3-4 months for it to completely dry out enough to paint. One easy way to test if pressure treated wood is ready to paint is to drop some water on its surface. If the water droplets bead up, you’ll know the treated wood is still too damp. Once the droplets are absorbed into the wood instead of being repelled, it’s ready to be painted.

When Not to Paint Pressure Treated Wood 

Be very aware that if you attempt painting pressure treated wood before it’s fully cured, it can leave you with a disaster. If you paint one side of the wood but it isn’t fully dry, you will most likely deal with some pretty severe warping. The non-painted side will dry faster and when that happens, you’ll end up not only with warped wood but with peeling and cracking paint as well. 

How to Paint Pressure Treated Wood 

Painting pressure treated wood involves steps that you wouldn’t necessarily take when painting regular lumber. Below is a list of step-by-step instructions you’ll need when painting pressure treated wood:

Step 1. Thoroughly Clean the Wood

Making sure the wood you’re working with is clean is the first step you’ll need to take before painting. Using a stiff-bristled brush and a solution of soapy water, scrub the entire surface of the wood. Follow up the cleaning with a good rinse and let dry. 

Step 2. Let the Wood Dry 

If you have an upcoming project that involves pressure treated wood, make sure and plan ahead when considering drying time. Be prepared that it could take as long as a few weeks to a couple of months. If you have a deadline on your project, it may be worth purchasing pressure treated wood that has already been through the drying process. 

Once the wood feels dry, test it out by using the water droplet method mentioned earlier in this article. If water beads up on the surface of the treated wood, it needs more time to dry. If the water absorbs into the wood, it’s dry enough to go forward with your painting. 

Step 3. Apply Primer 

Once you know your wood is completely dry you can begin applying your primer. Make sure and purchase a primer that is designed for exterior pressure-treated wood. A paint sprayer is fast and efficient but also using a brush may be necessary to catch all the detail work. 

Step 4. Apply Paint or Stain 

After you’ve allowed proper time for the primer coat to dry, you can start applying your top coats. We recommend applying two coats for the best protection and coverage. Stick with using latex paints as they tend to work best when dealing with pressure treated wood. Avoid using oil-based paints. 

Can You Paint Pressure Treated Wood Conclusion

Pressure treated wood may need a few extra steps in preparation for painting but other than that it’s a fairly straightforward process. However, if you feel your painting project may be more involved than you would like, and you live in the Boise area, calling in the professionals at Boise Home Painting is always a great option. Our team of experienced painters will be happy to answer all of your questions or give you a free quote. We serve the entire Boise area including Meridian and Eagle. Don’t hesitate to contact our office today!

Categories Exterior Painting

Exterior Paint Sheen & Finish Recommendations For Your Home

Exterior Paint Sheen

When choosing the best exterior paint sheen for your home, there’s more to it than just how it looks. It should be an important component in the paint-selection process as it can make or break the longevity of your paint and exterior surface. Doing your homework on the best sheen for exterior paint can really pay off in the long run. Read on to learn how to choose an exterior paint sheen for your specific climate as well as the benefits of using the correct finish. 

Before we go further, if you live in the Boise, Idaho area and need help painting the exterior of your home, we can help! We’ll give you a free estimate. In fact, we can even help you choose the best color for your home!

What Type of Exterior Paint Finish is Best? 

Paint sheen describes the glossiness or flatness of the paint once it dries. Some are better for painting trim and small details while others work well for siding. You need a finish that will protect your home from destructive UV rays which can cause your paint to peel, fade, or crack prematurely. Boise is known for hot, dry summers, freezing winters, and lots of rain in the fall and spring. For the best long-term results, you’ll need exterior paint made with high-quality resins, additives, and pigments. Finding the best paint sheen for your home will save you from repainting for years to come. Choosing the correct paint sheen has a big impact on how long your paint will last on exterior surfaces such as trim, doors, and siding. There are basically five different types of paint sheens that are used in exterior painting. Let’s go over each one so you’ll know when it’s appropriate to use them and when there’s a better choice. 

  • Flat or Matte Paint Finish 

While flat exterior paint finishes are used quite often, they aren’t the best choice for exterior projects. Because flat paint is porous, it’s more susceptible to fading and rotting from mildew problems. A finish with a shinier sheen is more protective, easier to clean, and aesthetically more pleasing. For this reason, flat or matte paint may be an option to consider for exterior walls only but not trim or doors. Because flat paint has little or no sheen, it’s excellent at concealing imperfections in your siding or wood. 

  • Eggshell Paint Finish 

Eggshell is considered the best sheen for exterior paint when it comes to painting the body of your home. It’s the perfect happy medium, landing between flat and satin finishes. Not too flat or too shiny, eggshell looks great on a variety of siding types. Because it’s easy to clean and provides a

pleasant appearance, it’s the preferred finish for most homeowners. If you’re repainting your house and are looking for a finish that can conceal small imperfections while being durable and looking nice, go with eggshell paint. 

  • Satin Paint Finish 

Satin paint has a bit more sheen than eggshell which makes it more durable, easy to clean, and holds up against abrasion. Satin and eggshell are fairly similar in popularity when it comes to exterior paint and are both excellent options. It’s a great choice for your trim if you want a glossy look without going overboard. Satin is exceptionally nice if you live in a hot, sunny climate like the Treasure Valley. The extra sheen makes a big difference when it comes to protecting your home from the UV rays.

  • Semi-Gloss Paint Finish 

Semi-gloss paint has noticeably more shine to it than the finishes mentioned above. This makes it perfect for surfaces that require frequent cleaning and upkeep. Not only is it easy to clean, but it protects against moisture and is more durable than satin. It’s important to note that the shinier the finish, the more imperfections you will be able to see. Semi-gloss is perfect for trim, shutters, garage doors, railings, and window sills. 

  • High-Gloss Paint Finish 

High gloss is too shiny to use on your exterior siding but is perfect when used to highlight architectural details, doors, and trim. Its beautiful shine can really bring the wow factor to your home when used appropriately. Its durable sheen adds richness to any color. Any part of your exterior that might get touched on a regular basis can benefit from a high-gloss finish. This includes window frames, decorative fixtures, shutters, decorative trim, and more. 

Glossy paint finishes may also be an option if your exterior will need to be washed frequently. For example, if you live in an area where dust can be a problem or have adventurous children. However, the shininess factor has a tendency to spotlight every imperfection which still makes eggshell a better overall choice. 

What Sheen should you Use for Exterior Paint?

Before you determine which paint sheen to use, consider what surface you are painting. Keep in mind that lower sheen paints such as satin or eggshell are often used for the body of the house while higher sheen paints like semi-gloss work best for accents, trim, and doors. Choosing the proper sheen for different outdoor surfaces will help you create a beautiful look and get the most from your paint. 

Satin or Semi-Gloss for Exterior Trim? 

When you’re talking about exterior trim, semi-gloss or high-gloss will always reign supreme. Satin is the preferred choice for exterior siding or walls but lacks the durability for areas like trim, doors, and shutters.

What is the Longest Lasting Exterior Paint? 

Painting the exterior of your home is expensive and time-consuming. Since it’s quite an undertaking, you want your paint job to last as long as possible. You don’t want to have to repeat the process over and over again. The sheen you choose plays a big part in longevity but what kind of exterior paint lasts the longest? 

Acrylic paint is the most durable with its ability to withstand fading from the sun, damage from the elements, and has overall great flexibility. This paint is water-based but has an added acrylic binding agent. Use acrylic paint for wood and aluminum siding, stucco, plaster, and drywall. 

What is the Best Time to Paint Your House Exterior? 

Painting the exterior of your home isn’t the type of job that you can do effectively any time of the year. Weather can play into the success of your paint job quite a bit. With that said, early summer and early fall are the ideal times for exterior painting. It’s always best to aim for a day that’s not too hot or too cold. The paint will dry the best when it’s not too humid. Avoid rainy days and always make sure all the surfaces you’ll be painting are completely dry.

Choosing the Best Exterior Paint Sheen For Your Home Conclusion

If you’re ready to upgrade your home’s exterior paint but still have questions about the best sheen, contact Boise Home Painting. Our professional painters have years of experience helping homeowners choose not only the best colors for their exterior but the best finish as well. We serve the entire Treasure Valley including Meridian, Nampa, and Eagle, and pride ourselves in treating each paint job like it’s our own. Click here to get your free estimate!

Categories Exterior Painting

Can You Paint Roof Shingles? 

Can You Paint Roof Shingles?

Everyone’s grateful to have a roof over their head but most homeowners don’t spend much time thinking about the upkeep of their roof shingles. So, can you paint roof shingles? What are the pros and cons and is it something that is safe for the average person to attempt? If you do notice that your roof shingles are looking a little shabby, we can recommend some tricks and tips that may make the task less intimidating and help you get satisfying end results. 

Can you paint asphalt shingles? 

Yes, you can most definitely paint asphalt shingles. However, it can be a time-consuming and downright scary task to undertake on your own. We recommend hiring a professional to ensure the job is done correctly. Asphalt shingles are by far the most common type of roofing material used on Boise homes. This material performs well with the contrast in daily temperatures that is present in the Treasure Valley. For example, it may be very cool in the morning but may quickly rise to temperatures in the 90s by the afternoon.

Most asphalt roofs are durable and flexible enough to handle the constant contraction and expansion for approximately 20 years. They also tend to be a very competitively priced roofing material and come in a variety of styles and colors that look great with any style of home. Metal roofs are much less commonly used in Boise. While their longevity may be longer, they do cost more than asphalt shingles. So even though a metal roof can serve your home for a long time, most people agree they are less visually appealing. 

How to Paint Roof Shingles 

As mentioned above, taking on a project of this magnitude isn’t for everyone. But if you consider yourself somewhat of a handyman and want to cut down on expenses, there are some tips we recommend to help guide you through the project. 

  • Start by getting an inspection done 

It’s important to know if your roof is in need of any repairs before you ever start painting. Be sure to repair or replace any damaged shingles before applying any paint. 

  • Round up the right tools and equipment

For any project to be a success, it’s necessary to have the proper tools on hand. Here is a list of the basic tools you’ll need:

  1. High-pressure water blaster 
  2. Paint spray gun and pump 
  3. Extension ladder 
  4. Air respirator 
  5. Full bodysuit to protect your clothes 
  6. Tarps 
  • Gather Safety Equipment 

Obviously, there can be many accidents while working on your roof. Because of this fact, we recommend getting safety equipment for protection. You should always wear a harness and have set anchored points should you slip and fall. 

  • Clean Your Roof 

To achieve a smooth and consistent finish, you’ll need to remove all built-up dirt and grime before applying paint to your shingles.

  • Apply the Correct Primer and Sealer 

It’s really beneficial to use primer and sealer for the best results when painting your roof. Just be certain you purchase the right kind, depending on whether your shingles are asphalt or metal.

Why you should paint your roof shingles 

If you’re wondering if painting your roof shingles is a good idea, we’ve compiled a list of all the reasons someone may want to: 

  • More Affordable 

It’s no secret that repainting your roof shingles is a far less-expensive option than replacing the existing roof surface. Painting will also save you money in the long run because it will improve your energy efficiency.

  • Longer Roof Life 

A fresh coat of paint can extend the life of your roof by protecting it from the elements. However, you don’t want to make the mistake of applying the wrong kind of paint to your shingles. We recommend going with 100% acrylic latex in a flat finish for the most protection as well as aesthetics.

  • Updated New Look

When you start noticing your roof shingles are showing signs of wear and tear, a fresh coat of paint can be the best way to upgrade the look of your home. 

Why you should NOT paint your roof shingles 

Everything has a list of pros and cons. So here are a few reasons why it may not be the best idea to paint your roof shingles: 

  • Painted Shingles Means More Maintenance 

Unpainted shingles can look nice for up to 20 years. But once your shingles have been repainted, they will show signs of wear and tear much faster. Repainted shingles may need to be examined and routinely painted every 5-7 years or sooner depending on how quickly your paint deteriorates. Examine your roof on a yearly basis and be prepared to potentially go through the entire process all over again. 

  • You May Damage Your Roof 

If you don’t use the appropriate paint, you could likely damage your roof. You certainly don’t want to put in precious time and money to improve your roof, only to discover that it was better off left alone. You’ll need paint specifically designed for roofs. Acrylic latex, water-based paint allows moisture to escape from the shingles. Less moisture will discourage the growth of algae and mildew while protecting your home from roof leaks.

  • Painting Your Roof is Hard Work! 

Working on a roof pitch is dangerous and you’ll need lots of safety equipment. It’s time-consuming and requires tools that not everyone has just lying around. It just makes good sense to leave painting your roof shingles to the professionals. 

How Much Does it Cost to Paint Shingles? 

If you have an average-sized roof, you’ll roughly pay around $500 if you do the job yourself. This amount includes the paint and necessary equipment. If you have a larger-sized roof, you can expect that number to go much higher. 

A gallon of roof paint will cost somewhere between $30 to $40 dollars. One gallon should roughly cover 400 square feet. Quality rollers and paint trays will add an extra $50-$100. Throw in a few hundred more dollars to purchase a ladder and safety equipment.

When paying a professional contractor to paint your roof that is approximately 1200 sq ft., you should plan on paying between $4200-$6600. Plan on paying around $7000-$10,000 for a roof of around 2000 sq ft. 

Can You Paint Your Roof Singles Conclusion 

Painting your roof shingles is hard work. It can be dangerous and very time-consuming. Turn to the professionals at Boise Home Painting where we can put our experience and equipment to work for you. We use only the highest quality materials and current painting techniques to ensure your complete satisfaction. We serve the entire Boise area including Nampa, Meridian, and Eagle! Click here to get your free estimate for your roof and exterior painting needs!

Categories Exterior Painting

What is the Best Temperature to Paint Outside in Idaho?

What Is The Best Temperature To Paint Outside?

It’s important to consider the outside temperature and humidity before starting any exterior painting project. So what is the best temperature to paint outside in Idaho? Applying paint or stain to a project when it’s too cold may end up ruining your project entirely. Extreme heat can also be a detriment to drying paint. Because different temperature guidelines apply to different types of paint, it’s best to paint or stain when the temperature is between 60-85 degrees. In Idaho, this would mean that late Spring and early Fall are the best times to paint the outside of your home, deck, or patio furniture. 

What temperature can you paint outside? 

The last thing you want is to have to repaint your home because the outside conditions worked against you. For exterior projects, you never want to paint if the temperature is below 50 degrees or above 90 degrees Fahrenheit. Keep in mind that when using latex paint, it’s best if the temperature is between 50-70 degrees F. If you’re working with oil-based paint, between 45-90 degrees F. is your safe zone. However, you can purchase specially formulated latex paint made to perform in temperatures as low as 36 degrees if the job can’t wait for warmer days.

Painting in Extreme Heat 

The outside temperature is a huge factor when it comes to exterior painting. If it’s too hot or too cold, your paint might not bind together properly. This can also lead to other issues such as cracking and peeling of your paint once it fully dries. Painting when it’s too hot can also cause blisters and bubbles to form in the paint. With that said, we recommend not painting in temperatures above 90 degrees Fahrenheit. 

Painting in the Cold 

While no one would choose to paint outside in the cold, sometimes you just can’t avoid it. So, if you do attempt an outside painting project during the colder months in Idaho, be sure not to let the surface of the air temperature drop below 35 degrees for at least 36 hours after you’ve applied the paint. For best results, we recommend painting outside only if the temperature is above 50 degrees Fahrenheit. The cold air won’t allow your paint to cure properly. You may even end up with unsightly bumps or bubbles in your paint once the weather turns warm again.

Paint dries much slower in the cold. Be sure to allow ample time in between coats for your paint to completely dry. A good rule of thumb would be to wait a full 24 hours after each coat. 

The cold weather can even affect the quality of the application and the life expectancy of your paint. Cooler temperatures may cause the bristles on your paintbrush to stiffen, compromising the coverage and using more paint than is necessary. And because of the longer drying time, dirt, debris, leaves, and insects have more time to be attracted to and stick to your paint. 

Considering the amount of precious time and money you put into a painting project, it’s best to avoid working in cooler temperatures. The possible negative effects far outweigh the benefits. It certainly isn’t worth the risk.

How Humidity Affects Paint 

When it comes to exterior painting, warm, dry weather is ideal. Moisture can wreak havoc for painters. Too much humidity in the air can lead to water vapor forming on your newly painted surface. The best time to paint is when the humidity levels are between 40-and 70%. Fortunately, Boise has a high desert climate with an average humidity of 52.2%, making humidity less of a concern. Eastern Idaho and the northern part of the Gem state receive more precipitation than the Boise area by far. 

In the summer months that are hot and humid, it’s suggested that you start painting your home on the shady side and working your way around. This will help you as the painter avoid the heat of the sun as well as its constant glare. 

Below is a list of possible consequences for painting when the humidity levels are too high or too low. 

  1. Leaching- when high humidity causes brown or white discoloration on the surface of oil-based or latex paints. 
  2. Impedes adhesion- especially when working with wood surfaces, you must consider the humidity which is absorbed from the surrounding air. This causes the paint to bubble, peel, and keeps the paint from adhering properly to the surface. 
  3. Cracking– when the air doesn’t have enough humidity in it and is too dry, wood shrinks, leading to eventual splitting or cracking.

Painting in the Rain?

Obviously, it’s never a smart idea to paint when it’s raining outside. But one thing to be aware of is the need to allow plenty of time for the surface you will be painting to dry before applying any paint. We recommend giving the area you’ll be painting 4-8 hours of dry time before putting a brush to it. Once you’re finished painting, the area needs to remain dry for several hours. This will ensure a better bond and avoid problems down the road.

Best Exterior Paint 

Whatever paint you choose for the exterior of your home or shop is going to take a beating. Idaho summers can be sizzling hot in stark contrast to our wet and cold winters. That being said, it’s important you choose the best exterior paint that will protect your home and have excellent longevity. There are some real benefits to using water-based paints. These include being mold and mildew resistant, low VOC emissions, and superior adhesion. The fact that they can be used successfully even when the temperature falls below 50 degrees F. is also a win. With a short dry time, excellent coverage, and easy cleanup, water-based paints definitely have their advantages. 

However, latex paint has more flexibility, won’t yellow in the sun, and is more eco-friendly. Most painting professionals agree that latex paints are the superior choice for exterior jobs. Latex paint dries quickly, cleans up easily with just soap and water, and has less odor than oil-based paints.

Best Time to Paint Outside in Idaho Conclusion 

If you still have questions regarding exterior painting or need assistance with a painting project in the Boise area, don’t hesitate to contact Boise Home Painting. We offer a full range of painting services throughout the entire Treasure Valley. From Eagle and Nampa to Marsing, you won’t find a painting team more dedicated to doing the job right. Our professionals have years of experience and it shows. Click here to get your free estimate. We can help you with all of your commercial and residential painting needs!

Call Now