Categories Exterior Painting

How Much Does Exterior House Painting Cost in Boise?

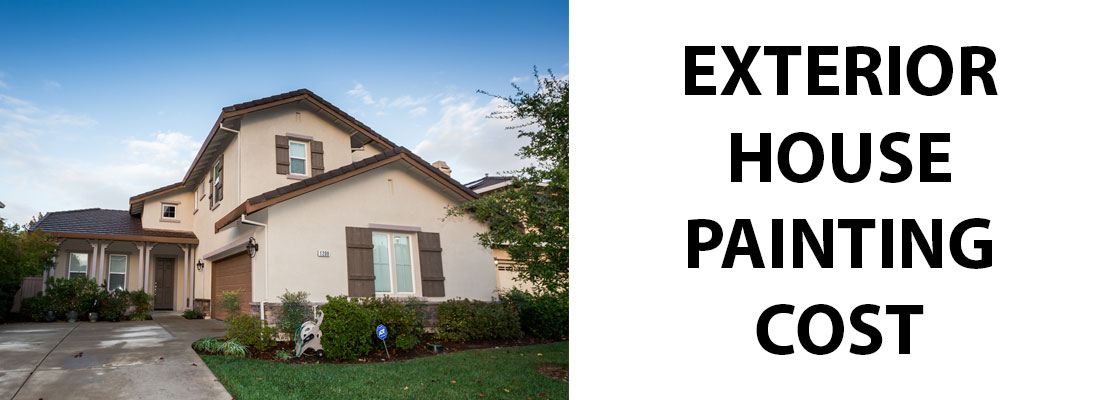
Exterior House Painting Cost

Key Takeaways

  • The typical house painting cost in Boise is approximately $5000-$10,000 for many residential exterior projects.
  • Exterior painting costs about$2-$4.50 per square foot of paintable surface, but your home’s floor area isn’t the same as its paintable surface area.
  • Preparation is a major part of the price. Pressure washing, scraping, sanding, caulking, priming and repairs can significantly affect the final house painting cost.
  • A 1500 square-foot home may cost roughly $3,500-$6,500, while a 3000 square-foot home may cost approximately $7,500-$13,000 depending on the project.
  • Hiring a professional can save time, improve the finish, and reduce safety risks, particularly for two-story homes and projects requiring extensive preparation.

If you’re planning to give your home a fresh look, one of the first questions you’ll probably ask is: How much does it cost to paint a house exterior in Boise? The answer depends on several factors, including the size of your home, the type and condition of the siding, the number of stories, paint quality, and how much preparation is needed. If you’re looking for home painting services in the Boise area, we can help you. We do just about every painting service there is, including exterior painting, interior painting, cabinet painting, and epoxy flooring. Wherever you’re located in the Boise area, we can serve you, from Boise to Meridian to Eagle and Middleton. Click the button below to get a free estimate. 

Get a Free Estimate

Idaho HOA Laws & Rules

How Much Does It Cost to Repaint a House?

The cost to repaint a house in Boise varies considerably. A small, single-story home with sound siding and minimal preparation could be toward the lower end of the range. An older home with peeling paint, damaged wood, extensive trim, multiple stories, or difficult access could cost substantially more.

Current Boise estimates put a complete exterior repaint anywhere from around $2,800 to $18,000, although that range includes unusually large or complicated projects. A more typical single-story home is often in the $4,000-$8000 range.

How Much Does Exterior Painting Cost?

A useful starting point is approximately $2-$4.50 per square foot of paintable exterior surface in the Boise area. However, don’t simply multiply your home’s advertised square footage by that number.

For example, a 2000 square-foot home doesn’t necessarily have 2,000 square feet of exterior wall surface. The number of stories, roofline, windows, doors, garage, trim, and siding configuration all influence how much area actually needs to be painted.

Siding material matters, too. Wood siding may require considerably more preparation than relatively easy-to-maintain fiber cement, while stucco and previously unpainted brick can require specialized products and techniques.

Exterior Painting Cost Per Square Foot

When comparing estimates, ask whether the contractor is quoting per square foot of living space or paintable surface.

For Boise homeowners, a general planning range of $2-$4.50 per square foot of paintable surface is reasonable. Wood siding can fall around $2.50-$4.50 per square foot, stucco around $2-$3.50, and fiber cement around $2-$3.

Remember that per-square-foot pricing is only a guideline. Two houses with the same square footage can have dramatically different house painting costs.

What Goes Into the Cost of Painting a House?

Several components make up your total exterior painting price.

Labor

Labor is usually one of the largest expenses. Exterior painting requires much more than applying paint. Professional painters need to prepare surfaces, protect landscaping and windows, set up ladders or scaffolding, apply primer where necessary, paint multiple coats, and clean up afterward.

Two-story homes usually cost more because of the additional time and equipment needed for safe access.

Materials

Materials include exterior paint, primer, caulk, masking materials, drop cloths, brushes, rollers, sprayers, and other supplies. Premium exterior coatings can cost more initially but may provide better durability and performance in Boise’s sun and seasonal weather.

Surface Preparation

Preparation can have a major impact on house painting cost. It may include pressure washing, scraping loose paint, sanding rough areas, replacing damaged caulk, priming bare surfaces, and repairing minor siding or wood damage.

This is one reason a very low painting estimate isn’t always the best value. Cutting preparation can result in premature peeling or failure.

Repairs and Access

Rotten wood, damaged siding, difficult architectural details, high walls, and extensive trim can increase the cost. If scaffolding or a lift is necessary, equipment and setup time can add to the project.

Best Home Paint Supply Stores in Boise

Cost to Paint a 1500-Square-Foot House Exterior

For a typical 1500-square-foot Boise home, homeowners should plan on approximately $3,500-$6,500 for professional exterior painting. A straightforward single-story ranch-style home with good siding may be near the lower end, while a home needing extensive preparation or having complex trim could approach or exceed the upper end.

Cost to Paint a 2,000-Square-Foot Exterior

A 2,000-square-foot home will often fall around $5,000-$9000 for a professional exterior repaint, depending on the home’s configuration and condition. Two-story construction, extensive trim, and difficult access can increase the house painting cost.

Cost to Paint a 3000-Square-Foot Exterior

For a 3000-square-foot-home, a reasonable Boise pricing range is approximately $7,500-$13,000. Larger homes usually have more trim, more stories, and more complicated access, which can increase labor beyond what square footage alone would suggest.

DIY Cost vs. Hiring a Professional

DIY exterior painting can appear substantially cheaper because you eliminate professional labor costs. You still need to purchase paint, primer, caulk, brushes, rollers, sprayers, ladders, protective equipment, and other supplies. A basic materials-only project can potentially cost a few thousand dollars depending on the size of the house and paint system.

The bigger consideration is time and execution. Exterior painting can involve several days of preparation and painting, and working at height presents real concerns. Mistakes in surface preparation or coating application can also reduce the lifespan of the paint job.

Hiring a professional costs more upfront, but you’re paying for experience, equipment, preparation, efficient application, and a finished result. For many homeowners, the convenience and reduced risk make professional painting the better choice.

How Much Does Exterior House Painting Cost in Boise? Conclusion

When you’re investing several thousand dollars in your home’s exterior, choosing the right contractor matters. At Boise Home Painting, we provide residential exterior painting services, along with other services such as dry rot repair and other painting work. We use full-time painters and offer a five-year guarantee on qualifying full exterior projects, subject to stated exclusions.

If you want professional results without taking on the time, equipment, and safety challenges of a DIY project, consider Boise Home Painting. Our professional evaluation can also give you a much more accurate house painting cost based on your home’s actual siding, condition, accessibility, and preparation. Give us a call today!

Request More Info

What is the Best Temperature to Paint Outside?

Frequently Asked Questions

What time of year is best to paint a house exterior in Boise?

Generally, late Spring through early Fall is the best window for exterior painting in Boise. Local painting guidance identifies roughly May through October as the preferred season, with June and September offering particularly good conditions. Extremely hot summer afternoons can also affect application and curing, so professional painters may adjust their schedules accordingly.

What color house sells the fastest?

Neutral exterior colors are generally the safest choice when resale is the priority. White, off-white, light gray, beige, and other understated colors tend to have broad appeal. However, there isn’t a single color guaranteed to make a house sell faster. Neighborhood trends, architecture, landscaping, and the condition of the home all matter.

Is it better to roll or spray exterior house paint?

Neither method is universally better. Spraying can provide efficient, even coverage over large areas, while rolling can offer excellent control and is commonly used for certain siding surfaces. Professional painters typically use a combination of spraying and back-rolling to achieve thorough coverage and a consistent finish.

How often should a Boise home exterior be repainted?

Many exterior paint jobs can last approximately 7-10 years, although the actual lifespan depends on the siding, paint system, sun exposure, preparation, and ongoing maintenance. South-facing and west-facing surfaces may show wear sooner because of increased sun exposure.

What increases the house painting the most?

The biggest factors are typically surface preparation, home size, number of stories, siding condition, repairs, trim/detail work, paint quality, and accessibility. Peeling paint, wood rot, and extensive caulking or scraping can make preparation particularly labor-intensive.

How can I get an accurate exterior painting estimate?

The best approach is to have a professional inspect the property and provide a detailed written estimate. Ask what preparation, repairs, primer, number of coats, materials, and cleanup are included so you’re comparing complete scopes of work rather than just headline prices.

Categories Painting

Best Time to Paint Your Boise Home When Moving

Moving in Boise can feel like a full time job. Between closing dates, movers, utilities, and the chaos of boxes, it is easy to push painting to the bottom of the list. The problem is that painting becomes harder and more disruptive once furniture is in place. Choosing the right time to paint can save money, reduce stress, and help your new home feel finished faster. 

There is no one perfect answer for every move, but there are clear advantages to painting at specific moments. Below is a practical guide to help you decide when to schedule painting based on your timeline and goals.

Get a Free Estimate


Option 1: Paint before moving in
 
If you have any flexibility between closing and move in day, painting before you bring furniture is usually the best option. Empty rooms allow painters to work efficiently, protect surfaces more easily, and deliver cleaner finishes. 
 
Benefits of painting before move in 
Faster completion because there is no furniture to move 
Better prep work, including patching and sanding without working around belongings 
Cleaner lines and smoother results, especially on trim and doors 
Less disruption because you are not living in the space during the work 
No need to cover or relocate furniture multiple times 
 
If you are planning a full interior repaint or you want multiple rooms updated, painting before move in is often the most cost effective approach. Boise Home Painting provides interior painting services in Boise. You can review that service here: https://boisehomepainting.com/service/interior-painting-boise-id/ 
 
Option 2: Paint right after closing, before unpacking 
Some homeowners close and move quickly, but still have a short window before they fully unpack. This timing can work well if you can keep boxes in one area or delay furniture delivery for a few days. 
 
This option is common when: 
You want to repaint bedrooms and main living areas quickly 
You are updating colors but do not need a whole home repaint 
You want to repaint trim, doors, or a kitchen while the home is still mostly empty 
 
If you choose this approach, prioritize rooms you use daily first. Bedrooms, kitchens, and living rooms give the most immediate benefit. 
 
Option 3: Paint after you are settled 
Sometimes you need to move in right away, or you want to live in the home before choosing colors. Painting later can still be a good choice, especially for accent walls, feature spaces, or rooms where you want to test lighting and furniture placement. 
 
Benefits of painting after settling in 
You understand how you use each room 
You see natural light patterns and can choose colors with confidence 
You can prioritize projects based on comfort and budget 
You can plan upgrades around other improvements 
 
The tradeoff is disruption. Painting later means moving furniture, covering belongings, and working around daily routines. 
 

What to paint first during a move

If you do not have time to paint everything, start with the spaces that will make the home feel fresh and finished. 
 
Bedrooms 
Painting bedrooms early helps you settle in faster. Fresh paint also makes new bedding and furniture feel intentional. 
 
Main living spaces
 
Living rooms and hallways are high visibility areas. If walls are scuffed or colors are dark, repainting can dramatically improve the feel of the home. 
 
Kitchens and cabinets 
Cabinet painting is one of the highest impact updates for a new homeowner. It can modernize the kitchen without a full remodel. If your exterior also needs attention later, Boise Home Painting offers exterior painting services here: 

Trim and doors 
Trim and doors take a lot of wear. Fresh trim paint makes the whole home look cleaner, especially in entryways and hallways. 


How to plan your painting schedule – A few simple steps make the project smooth. 

Pick your priorities 
Decide what must be done before furniture arrives versus what can wait. 
 
Choose colors with flow
 
Consider how colors connect from room to room. Consistency is often more important than bold choices during a busy move. 
 
Build a realistic timeline 
If you have a move date, plan painting before cleaning and before final furniture placement whenever possible. 
 
Work with a professional painter 
A professional team handles prep, surface repairs, and clean application so the paint lasts. That matters when you want the home to feel finished for years, not weeks. 
 
Get help from Boise Home Painting 
If you are moving into a new home and want a plan for when to paint, Boise Home Painting can help you choose the right timing and scope. Start with a free estimate here:


Contact Us Today


Categories Painting

How Painting Helps Homes Sell Faster in Boise

When you are preparing to sell a home in Boise, you want buyers to feel confident from the first photo to the final walkthrough. Fresh paint is one of the most practical upgrades for sellers because it changes the feel of a space quickly, it is relatively affordable compared to renovations, and it removes the visual distractions that can cause buyers to hesitate. 

In a competitive market, many homes have similar layouts, similar features, and similar neighborhoods. Paint becomes a differentiator because it influences first impressions. It tells buyers whether the home feels cared for, current, and move in ready.

Get a Free Estimate

Why paint affects the speed of sale

Buyers decide emotionally and justify logically. If the home feels clean and updated, buyers tend to assume the rest of the home has been maintained. If walls look scuffed, colors feel dated, or trim looks tired, buyers often start looking for other problems, even if none exist. 
 
Fresh paint also improves how a home shows online. Most buyers in Boise start on listings sites. If photos feel bright and consistent, they are more likely to schedule a showing. 
 
Interior painting makes spaces feel larger and brighter 
Interior painting is often the fastest way to make a home feel new. Neutral colors reflect light better and help rooms feel more open. They also provide a simple backdrop for staging and furniture. If you are unsure what colors sell best, the goal is usually consistency, not trendy choices. 


Common seller priorities include:

Living rooms and family rooms, because these spaces anchor the home 
Hallways and entryways, because they set the first interior impression 
Bedrooms, especially if walls are dark or heavily personalized 
Kitchens and dining areas, where buyers imagine daily life 
 
Boise Home Painting provides interior painting services that include prep, patching, and a smooth finish. You can review interior options here: 

Trim and doors are the detail that buyers notice 
A home can have freshly painted walls and still feel unfinished if trim and doors look worn. Clean baseboards, sharp door edges, and consistent trim color create a polished look. This is especially important in older homes where trim profiles are a key feature. Repainting trim also helps unify rooms when wall colors change. 
 
Cabinet painting can modernize the kitchen without remodeling 
Kitchens sell homes. If cabinets are dated but structurally sound, painting them can create a modern look without the cost of replacement. This works well for sellers who want to increase appeal without taking on a full renovation timeline. Cabinet painting also pairs well with simple hardware updates, which many sellers do as part of listing prep. 
 
Exterior paint creates curb appeal and buyer confidence 
Curb appeal is not only about aesthetics. It is about confidence. Buyers often decide how they feel about a home before they step inside. If the exterior looks maintained, buyers walk in expecting good things. If the exterior looks faded or neglected, they walk in looking for flaws. 

Exterior painting can include siding, trim, fascia, and front doors. Even if a full repaint is not needed, refreshing trim and the front entry can improve first impressions. Boise Home Painting offers exterior house painting services here: 
 
Touch ups matter for photos and open houses 
Small issues become big issues in photos. Patch marks, scuffs near light switches, worn corners, and mismatched touch up paint can stand out. Targeted touch ups can clean up these areas and make the home look consistent. 


Where sellers commonly need touch ups: 

Entryways and stairwells 
Kitchen and bathroom walls near sinks and counters 
Kids rooms and high traffic hallways 
Baseboards and door frames 
 
How to decide what to paint before listing 
Not every seller needs to repaint the entire home. The best approach depends on the home’s condition, the target buyer, and the timeline. A simple planning process helps. 
 
Start with the highest impact areas 
Focus on spaces buyers see first and use most. Entry, living spaces, and kitchens usually offer the best return. 
 
Choose a consistent, buyer friendly palette 
Consistency helps the home feel calm and cohesive. Buyers respond well to neutral, clean colors that do not compete with staging. 
 
Fix obvious wear 
Even if you do not repaint every room, address scuffs, patch marks, and areas that look neglected. 
 
Plan around cleaning and staging 
Painting should typically happen before deep cleaning and staging. That keeps dust down and ensures final photos reflect the finished look. 
 
Work with Boise Home Painting 
Boise Home Painting helps sellers and real estate agents prepare homes to show at their best. If you are planning to list and want a clear recommendation on what to paint, start here: 


Contact Us Today


Categories Flooring

How Much Does It Cost To Epoxy A Garage Floor?

Cost To Epoxy A Garage Floor

Upgrading your garage floor with epoxy is one of the most effective ways to enhance both the appearance and durability of the space. But before starting your project, many homeowners want to know “What is the epoxy garage floor cost?’ The answer depends on several key factors, including the size of your garage, the type of epoxy used, labor costs, and how much surface preparation is needed. In this article, we’ll break down the specific costs specific to Idaho for one-, two-, and three-car garages, and explain what influences pricing so you can budget your project with confidence.

Get Free Paint Quote

Boise Epoxy Garage Flooring

Epoxy Garage Floor Cost 

Epoxy flooring in Idaho typically runs $5-$8per square foot installed—covering both materials and labor.

Using standard garage sizes (approximately 250 square feet for a one-car, 500 square feet for a two-car, and 750 square feet for a three-car), here’s what you can expect:

  • 1-car garage (approximately 250 square feet): $1,200-$1,900. Cost per square foot: $5-$7.60
  • 2-car garage (approximately 500 square feet): $2,400-$3,800. Cost per square foot: $4.80-$7.60
  • 3-car garage (approximately 750 square feet): $3,600-$5,700. Cost per square foot: $4.80-$7.60.

These Idaho-specific figures align nicely with national averages (professionally installed epoxy floors range from $1,530-$3210).

Cost Components to Consider

  • Cost of Labor: Labor typically accounts for 33-60% of your total cost—about $1- $7 per square foot, or $50-$150 per hour. Idaho rates align with this, though rural areas lean toward the lower end of that spectrum.
  • Materials
  • Water-based epoxy: $2-$5 per square foot, $30-$50 per gallon
  • Solvent-based: $40-$55 per gallon
  • 100% solid epoxy(industrial grade): $45-$150 per gallon
  • Rock/pebble systems &decorative flakes: $100-$150 per gallon
  • Surface Prep & Repairs: Mandatory prep tasks include grinding, acid-etching, pressure washing, and patching cracks.
  • Acid wash/etch: $50-$100 flat fee
  • Grinding (rent or hire): $400/day for equipment; contractor labor adds $1-$5 per square foot or $50-$150/hour
  • Patch repairs: $25-$250 depending on severity
  • Topcoat & Add-Ons
  • Urethane or polyaspartic topcoat: $2-$5 per square foot + labor
  • Decorative flakes or quartz: approximately $0.04 per square foot or $100 per gallon
  • Anti-slip additives (sand or aluminum oxide): Inexpensive but essential for safety

Equipment Overview

Here is a list of tasks and the equipment needed:

  • Concrete Prep: Diamond grinder with HEPA vacuum (rental is approximately $400/day)
  • Application: Squeegee, serrated roller, spiked shoes
  • Safety: Respirator (especially for solvent-based), gloves, goggles
  • Finishing: Urethane polyurethane sprayer/roller (for topcoat)

Diamond grinding is strongly recommended–acid etching from big-box stores often fails to properly prep the slab.

Should You Paint or Install Floors First?

Epoxy Types: Pros, Cons & Costs

Water-based epoxy

  • Cost: $30-$50 per gallon, or $2-$5 per square foot
  • Pros: Low VOC(volatile organic compounds),  easy for DIY 
  • Cons: Less durable, needs recoat every 1-3 years

Solvent-based epoxy

  • Cost: $40-$55 per gallon
  • Pros: Better resistance to heat and chemicals
  • Cons: High VOCs, requires professional-grade handling

100% Solid epoxy

  • Cost: $45-$150 per gallon
  • Pros: Extremely durable, long-lasting
  • Cons: Highest cost, professional installation required

Decorative systems (flakes/pebbles)

  • Cost: $100 + flakes/quartz
  • Pros: Great aesthetics
  • Cons: Labor-intensive prep, more expensive

Poyaspartic/Polyurea topcoats

  • Often used as a durable topcoat over epoxy base. UV-stable, non-yellowing

Preparing Your Garage for Epoxy: A Step-by-Step Guide

  • Clear everything out: Move cars, shelving, tools—clear the floor completely.
  • Repair cracks and damage: Use patchers or epoxy fillers; minor jobs are $25-$250.
  • Grinding: Diamond-grind the surface; essential for adhesion.
  • Cleaning: Vacuum using HEPA, mop with degreaser or denatured alcohol.
  • Etching(optional): Acid etch as backup; not effective alone.
  • Primer coat: Apply epoxy primer (esp. Moisture barrier priming) for better grip.
  • Basecoat: Apply chosen epoxy. If you want decorative flakes, broadcast them, then allow them to set.
  • Topcoat: Roll on urethane/polyaspartic to seal and protect. Add grip additives here if desired.
  • Cure: Typically 24-72 hours. Avoid foot and vehicle traffic until fully cured.

Epoxy Garage Floor Cost: DIY vs. Professional Installation

  • DIY kits (usually water-based) cost as little as $1,80 per square foot, but often peel, yellow, or fail prematurely. Renting a grinder and prepping the area can cost around $400 per day.
  • Professional rates for a solid, durable job run between $2,300 – $4000 for a 400 square foot garage.

Idaho-Specific Insights

Areas in Idaho like Boise, Meridian, Idaho Falls, Twin Falls follow the same $5-$8 per square foot installation range, making those quoted costs reliable.  Labor in rural suburban Idaho may skew toward lower hourly rates, usually around $50-$100 per hour. You can expect somewhat higher costs if your slab has moisture issues or major cracks.

Recommendations for Idaho Homeowners

  • Invest in proper prep. Diamond grinding + HEPA vacuum = long-lasting bond.
  • Select epoxy grade based on use:
  • Budget: water based (recoat every few years).
  • Mid-tier: solvent-based (better durability).
  • Premium: solid epoxy + polyaspartic (lasts 15+ years).
  • Add topcoat with UV-resistant polyaspartic to prevent yellowing.
  • Include non-slip additives unless the floor remains bone dry.
  • Get 2-3 quotes from local Idaho-based contractors; ask for prep and product specifics.
  • DIY only if experienced with grinding and epoxy systems–cheap kits rarely perform well long-term.

How Much Does It Cost To Epoxy A Garage Floor? Final Thoughts

For most Idaho homeowners, the typical epoxy garage floor cost runs approximately $5-$8 per square foot installed. Epoxy flooring has become a popular choice for homeowners looking to upgrade their garage floors with a sleek, durable, and low-maintenance finish. Whether you’re hoping to improve the look of a one-car garage or need a heavy-duty solution for a larger three-car space, understanding the cost of epoxy application is essential before starting the project. From the price of materials and labor to the type of epoxy used and the amount of prep work involved, several factors influence the final bill. 

If you’re considering an epoxy upgrade to your garage floor, Boise Home Painting is the trusted local expert you need. Our professional epoxy flooring services not only transform your garage into a cleaner, more polished space, but also protect your concrete from stains, cracks, and daily wear. Unlike DiY kits that often peel or fade, we use high-quality, commercial-grade epoxy and proven application methods to ensure a long-lasting, flawless finish.

As a locally owned company with a strong reputation for reliability and craftsmanship, we take pride in delivering results that exceed expectations. We serve the entire area with exterior and interior painting for both residential and industrial spaces, including Meridian, Nampa, and Eagle. Contact us today for a free estimate! 

Get Free Paint Quote

Enamel vs Latex Paint

Categories interior painting

Do You Paint Walls or Trim First? The Step By Step Guide

Paint Walls or Trim First?

Do you paint walls or trim first? It’s a classic question that many homeowners and DIY painters face when beginning a room makeover. The order you choose can impact not only the final look but also the ease of the project. Whether you’re aiming for crisp, clean lines or a faster paint job, understanding the pros and cons of each approach will help you get better results. 

If you’re looking for professional painters in Boise, Boise Home Painting can help. Our team of professional contractors serves customers across the Treasure Valley, offering high-quality painting that lasts. 

Get Free Paint Quote

Should You Paint or Install Floors First?

Should You Paint Baseboards or Walls First?

Before painting a room, you might be asking, “Do you paint trim or walls first?” It’s a common question, especially if it’s your first time tackling a painting project. If your baseboards are already in good shape, just tape them off and paint the walls. But if they need to be painted, most pros recommend painting the trim first because:

  • It’s easier to tape off trim than walls. Once the trim is dry, you can easily tape along the crisp edge of trim to protect it while painting the walls. 
  • There’s less risk of smudging finished walls. If you paint the walls first, you risk accidental smudges while painting the trim. 
  • Trim usually needs more precision, so it’s better to focus on that with a clean slate. 
  • Baseboards often need more prep. You can patch, sand, and prime them without worrying about damaging freshly painted walls. 

Once the trim dries completely (ideally 24 hours), you can tape it off and paint the walls. This will give you the cleanest lines while avoiding the need for constant touch-ups.

Pros and Cons of Painting Trim First

While every method has its pros and cons, most professionals start by painting the trim first. The benefits of this include:

  • Cleaner, sharper lines: It’s easier to tape along the straight edge of the trim after it’s painted and dried, which results in crisp lines where the trim meets the wall. 
  • Faster wall painting: Once the trim is done and taped off, you can roll the walls quickly without worrying about precision near the baseboards or moldings. 
  • Less risk of drips: Painting the trim first avoids accidentally dripping trim paint on fresh walls. 
  • Allows for proper trim prep: Trim often needs filling, sanding, and priming, which can be messy. Doing this first allows you to properly prep the trim without damaging painted walls. 

While painting the trim first is what most professionals prefer, there are a few downsides, including:

  • Requires more patience: You need to wait for the trim to dry completely–usually at least 24 hours–before taping it off and painting the walls. 
  • Risk of scuffing trim: While painting walls, especially in tight corners, it’s still possible to bump into the trim, which will require touch-ups. 
  • Can be more noticeable: If you rush or use low-quality tape, uneven lines along the trim can stand out more when walls are painted last. 

Pros and Cons of Painting the Walls First

While most pros recommend painting the trim first, there are some benefits to starting with the walls, including:

  • Faster start: You can roll out the walls immediately without worrying about damaging finished trim. 
  • More forgiving for DIYers: If you’re new to painting, starting with walls lets you focus on broad strokes without worrying about tight corners. 
  • Touch-ups: If you accidentally get wall paint on the trim, it’s not a big deal. You’ll be painting the trim last, so any drips will get covered. 

Some of the disadvantages of starting with the walls first include: 

  • Harder to get crisp lines: Painting the trim after the walls often requires careful hand-brushing or precise taping, which can be tricky. Your lines may not be as crisp. 
  • Risk of smudging the walls: When painting the trim last, it’s easy to accidentally brush onto your finished wall surfaces. 
  • Taping walls can be tricky: Protecting the walls while painting can be harder than taping off trim first. Walls aren’t always perfectly straight or smooth at the edges. 

How to Paint a Room

Supplies you’ll need:

  • Drop cloths or plastic sheeting
  • Painter’s tape
  • Paint
  • Primer (if needed)
  • Paint roller
  • Angled brush for cutting in
  • Paint tray and liners
  • Sandpaper or sanding block
  • Putty knife and patching compound
  • Ladder or step stool
  • Damp rags for cleanup

Step 1: Prepare the Room

Start by moving furniture to the center of the room, or out of the way completely. Cover floors and furniture with drop cloths, and remove outlet covers and light switch plates. Clean the walls with a damp cloth to remove dust and grime. Fill holes or cracks with spackle. Once dry, sand it smooth. 

Step 2: Paint the Trim

Paint the trim and baseboards, using a paint with a semi-gloss finish. This will last longer against accidental kicks and bumps and is easier to clean. Once the paint has dried for at least 24 hours, apply painter’s tape along the trim, baseboards, window frames, and fixtures. Press the tape firmly to prevent bleeding. 

Step 3: Paint the Ceiling

After you paint the trim, many professionals recommend painting the ceiling. This will help you avoid drips and splatters from on your freshly painted walls. Plus, you can work on the ceiling while the trim is still drying. Start by cutting in along the edges of the ceiling. Use a ⅜ in nap roller and flat paint to paint the ceiling, rolling in the same direction. Roll in the opposite direction for a second coat. 

Step 4: Cut In the Edges

Use an angled brush to carefully paint along ceilings, corners, trim, and baseboards. This step is called “cutting in.” It creates a border for easy rolling. Work in sections so the edges stay wet as you roll. 

Step 5: Paint the walls

Pour paint into a tray and load the roller evenly. Maintain a wet edge to avoid lap marks. Two coats are standard for even coverage, but make sure you wait the recommended drying time between coats, usually 2 to 4 hours for water-based paints and at least 24 hours for oil-based paints. 

Touch up any missed spots or thin areas as needed. For cleaner lines, remove the painter’s tape carefully while the paint is still slightly tacky. 

Step 6: Clean up

Once you’ve finished the room, wash brushes and rollers immediately. Dried paint can be difficult to remove. Water-based paints can be cleaned with water, but you’ll need a solvent like turpentine or paint thinner to clean oil-based paints from your brushes. When the paint is completely dry, you can reattach outlet covers, switch plates, and hardware. 

Enamel vs Latex Paint

How to Paint Trim Once the Walls Have Been Painted

If the walls have already been painted, wait until they’ve had a chance to dry for at least 24 hours. Then, start by cleaning the trim. Wipe it down to remove dust, dirt, or oils. Clean surfaces allow the paint to stick better. Once the trim is all clean, carefully tape where the trim meets the wall, and press down firmly. 

Lay down drop cloths or plastic to protect the floor from drips. Then, using a high-quality angled brush, paint the trim. Load the brush lightly so the paint doesn’t drip. Start with long, smooth strokes, working along the edges and corners. Paint in the direction of the trim grain. When finished, pull the tape while the paint is still slightly wet. 

How to Paint Walls

Nothing is more frustrating than spending your time painting only to have ugly lap marks or drips left behind. Luckily, there are some tricks you can use for a better result. First of all, don’t overload your roller. Thin, even coats work best and dry more quickly. To avoid lap marks, maintain a wet edge. This means overlapping the previous stroke with the current one while still wet. 

When you can’t maintain a wet edge, feathering out the edges with thin strokes and a nearly-dry roller can help you avoid the dreaded lap marks. Once you reload the roller, start by painting the feathered edges. 

How to Get Clean Lines

Clean edges are not just for the professionals. If you want clean lines on your DIY paint project, follow these tips:

  • Use high-quality painter’s tape. Go for brands like FrogTape, which has special paint-blocking technology, or 3M ScotchBlue. Avoid cheap tape, which doesn’t seal well. 
  • Prep the surface properly. Make sure walls and trim are clean and dry. Dust and grease can stop the tape from sticking. 
  • Press the tape firmly along the edge. Use a putty knife or fingernail to seal it tightly. 
  • Use the “Sealing the Tape” trick. After applying the tape, paint along the tape edge with the same color as the base wall or trim. Let that coat dry before painting your final color. Any paint that bleeds will match the base color. 
  • Paint carefully along edges. Don’t overload your brush or roller near the taped area. Use smooth, even strokes. 
  • Remove the tape at the right time, while the paint is still slightly wet. Pull it back at a 45-degree angle for a sharp, clean edge. If the paint has fully dried, lightly score the edge with a utility knife before removing. 

Should You Use Primer?

Primer is a coating applied before painting, but is it necessary? Not always. If you’re working on bare or new surfaces like drywall or wood, you’ll need a primer to seal the surface so the paint absorbs evenly. If you’re painting over a stained or dark wall, primer can help block the color from showing through. Additionally, high-moisture areas like bathrooms, kitchens, or basements can benefit from a moisture-resistant primer to prevent mold and peeling. 

However, you might not need a primer if:

  • Your walls are in good condition.
  • You’re using a similar color.
  • You’re using a product with paint and primer in one.
  • You’re just touching up or doing a small project. 

Where to Buy Paint Supplies in Boise

Looking to buy paint supplies in Boise? Check out these quality painting supply stores that will have everything you need:

  • Sherwin-Williams: 7160 Fairview Ave., Boise, ID 83704
    • Sherwin-Williams offers expert color matching, paint samples, and both residential and professional-grade products. 
  • Miller Paint: 7440 W Lemhi St, Boise, ID 83709
    • A regional PNW brand with a Boise branch, Miller Paint offers premium interior and exterior paints. 
  • Paint Life Supply Co.: 4618 W State St., Boise, ID 83703
    • Paint Life Supply Co. is a painter-focused store with quality tools, expert advice, and resources for both pros and DIYers. 

Conclusion

So do you paint walls or trim first? The answer depends on who you’re talking to, but most experts agree that it’s best to paint your trim first. 

If you’re looking for expert painters in the Treasure Valley, Boise Home Painting is here to help. We offer interior and exterior painting services for customers in Boise and the surrounding areas. We serve the entire area with exterior and interior painting for both residential and industrial spaces, including Meridian, Nampa, and Eagle. We also do epoxy flooring. Contact us today for an estimate! 

Get Free Paint Estimate

Should Caulk Before Or After Painting?

1 2 3 … 8
Call Now